
Using/Configuring Autodrive
Before reading this article, we recommend reading the Paths & Signals tutorial.
Preparations:
- Configure a path on one of your signals (keep in mind that you need atleast 2 consecutive signals - ideally a "signal block" - in order for this tutorial to work). Remember the name of this path.
- Place a locomotive infront of the signal with the configured path
- Enter the locomotive and set it up to go forward (but don't accelerate!)
- Enter the chat and type the following command:
|
Command: |
Function: |
|
/setdest <pathname> |
Makes the train follow a specific user-preconfigured signal path. <pathname> must be replaced by your paths name! |
The trains main display (by default the center display) should now start displaying upcoming/current speed limits and/or upcoming track events (stops, signals, etc.).
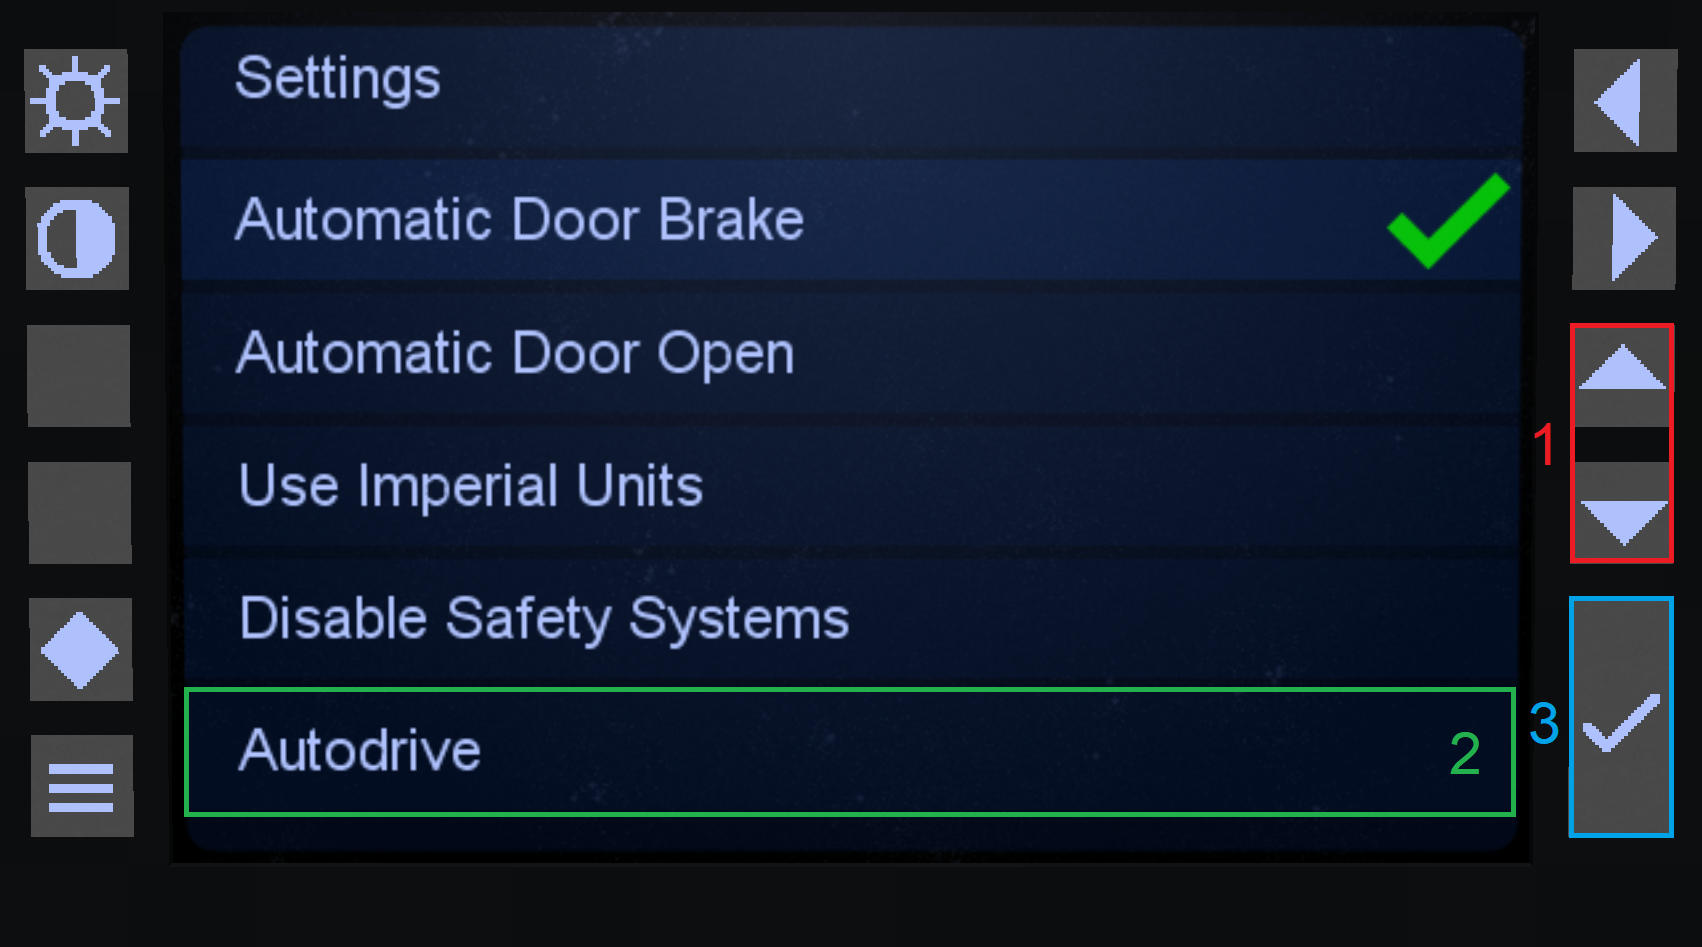
Activating Autodrive:
|
|
There should now be a green checkmark behind "Autodrive" signalling that it is now active. The train should now start moving on its own until it cannot follow any more paths. |
|
You can easily spot trains which have autodrive active through the villager in their cabs.
No comments to display
No comments to display