# Configuring Magnets

Magnets are the core component of ZnDs MTCS system (similar to ETCS). MTCS is a system made for controlling trains and using [autodrive](https://zoranodensha.de/books/zora-no-densha/page/usingconfiguring-autodrive "Using/Configuring Autodrive").

## **Placing magnets:**

Magnets can be placed on these tracks:

- [Straight Track (0°) 1m](https://zoranodensha.de/books/zora-no-densha/page/types-of-tracks#bkmrk-straight-track-%280%C2%B0%29)
- [Straight Track (11°)](https://zoranodensha.de/books/zora-no-densha/page/types-of-tracks#bkmrk-straight-track-%2811%C2%B0%29)
- [Straight Track (18°)](https://zoranodensha.de/books/zora-no-densha/page/types-of-tracks#bkmrk-straight-track-%2818%C2%B0%29)
- [Straight Track (45°) 1m](https://zoranodensha.de/books/zora-no-densha/page/types-of-tracks#bkmrk-straight-track-%2845%C2%B0%29)

<table border="1" id="bkmrk-to-add-a-magnet-to-o" style="border-collapse: collapse; width: 100%; border-width: 0px;"><colgroup><col style="width: 80.1191%;"></col><col style="width: 19.881%;"></col></colgroup><tbody><tr><td style="border-width: 0px;">To add a magnet to one of these tracks simply rightclick your track with the **Magnet \[Railway Part\]** item.

**Magnets are directional** (they work only in one direction), so make sure to place them (and the corresponding track) while facing in the correct direction!

***WARNING:** <span style="color: rgb(224, 62, 45);">Copying magnets with a Railway Worker's Tool also copies the magnets config. To avoid problems</span>*<span style="color: rgb(224, 62, 45);"> *with the configuration always use freshly placed, not copied, magnets.*</span>

</td><td style="border-width: 0px;">[![Magnet [Railway Part]](https://zoranodensha.de/uploads/images/gallery/2025-04/scaled-1680-/ukvgrafik.png)](https://zoranodensha.de/uploads/images/gallery/2025-04/ukvgrafik.png)</td></tr></tbody></table>

## **Configuring magnets:**

<table border="1" class="align-left" id="bkmrk-to-configure-magnets" style="border-collapse: collapse; width: 100%; border-width: 0px; height: 467.617px;"><colgroup><col style="width: 50%;"></col><col style="width: 50%;"></col></colgroup><tbody><tr style="height: 68.75px;"><td style="border-width: 0px; height: 68.75px;">To configure magnets you need a Signaller's Tool.   
  
This tool can only be used to <span style="text-decoration: underline;">**set**</span> a magnets configuration. It displays the most recently setup config.  
  
There currently is no way of reading a magnets config other than placing down a train and having a look at the next upcoming speed limit.</td><td style="border-width: 0px; height: 68.75px;">[![Signaller's Tool](https://zoranodensha.de/uploads/images/gallery/2025-04/scaled-1680-/fBWgrafik.png)](https://zoranodensha.de/uploads/images/gallery/2025-04/fBWgrafik.png)</td></tr><tr style="height: 398.867px;"><td style="border-width: 0px; height: 398.867px;">1. Rightclick while holding your Signaller's Tool
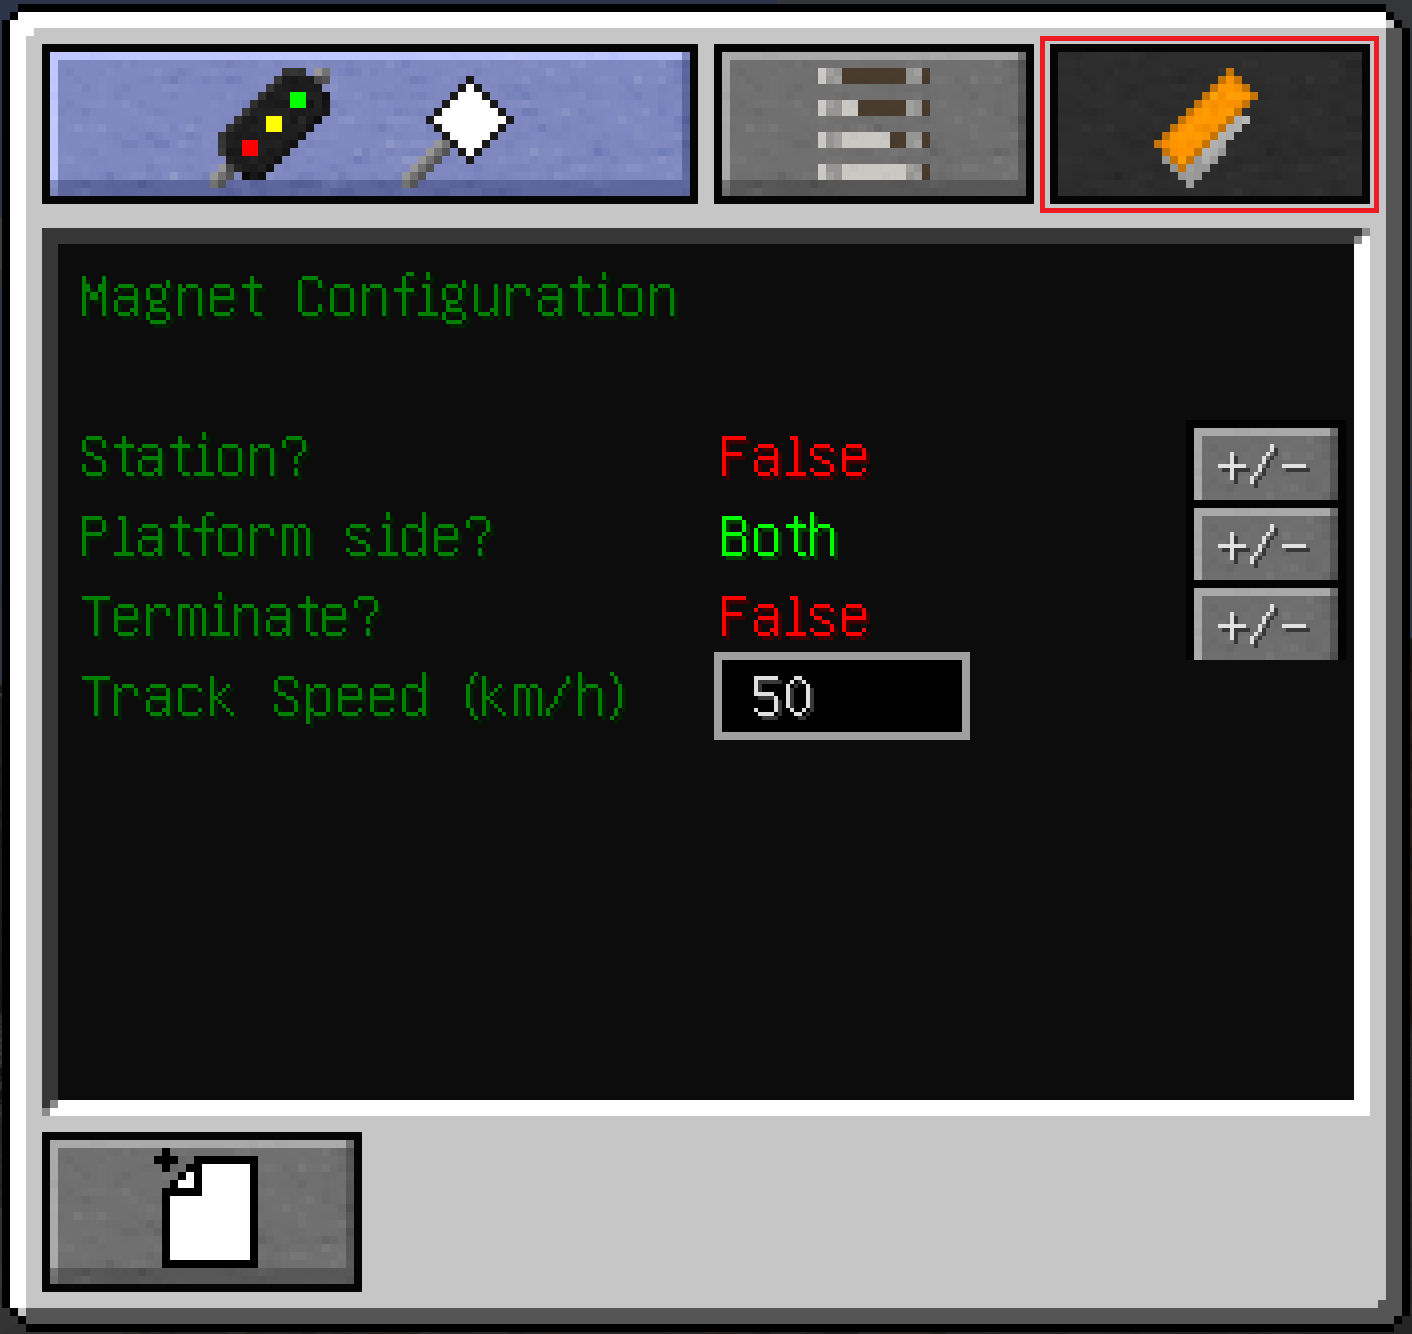
2. Click on the Magnet symbol

You may now configure the magnet according to your needed function.

To apply this configuration to the magnet, exit this menu by pressing **ESCAPE**, hold **SHIFT** and **RIGHTCLICK** your magnet.

If done correctly it should say:

<span style="color: rgb(241, 196, 15);">zoranodensha - Applied settings to magnet</span>

</td><td style="border-width: 0px; height: 398.867px;">[![ZnDWiki-Signal-Tool-Interface-Magnet.png](https://zoranodensha.de/uploads/images/gallery/2025-04/scaled-1680-/zndwiki-signal-tool-interface-magnet.png)](https://zoranodensha.de/uploads/images/gallery/2025-04/zndwiki-signal-tool-interface-magnet.png)</td></tr></tbody></table>