Zora no Densha
Welcome to the Zora no Densha Wiki page! We hope you will enjoy your stay and find what you are looking for.
- Home
- ZnD Releases
- Issues & Bugs
- Crafting & placing Tracks
- Placing, coupling, driving & creating Trains
- Default Key Binds (Trains)
- Cab Displays - MTMS & MTCS Display
- Driving Trains Basics
- Driving Trains Advanced
- Coupling Mechanics
- The Model Editor/Creating Custom Models
- Porting Trains to newer ZnD versions (from v0.9.X to v0.10.X)
- Getting, importing custom models and placing trains
- Magnets, Paths & Signals
- Autodrive & Improving Performance
- Signal Panel & Manual Signalling
- Signalpacks
- Items, Fluids, etc.
- Development & Beta Testing
Home
CLICK HERE TO GO TO THE CHAPTER OVERVIEW!
CUSTOM MODELS CAN BE FOUND HERE!
Welcome!
Welcome to the Zora no Densha Minecraft mods official wiki. Here you can download the newest versions or get answers to your questions. Please keep in mind that this wiki focuses on the newer v0.10.X of the mod. For questions regarding v0.9.X you may go to the legacy wiki here.
If you want to download ZnD, click here to go to the download-section.
If you are looking for the wiki-pages click here, to go to the chapter overview or use the quick-information section down below.
If you are looking for known issues/bugs or want to report a bug, click here.
You can join the official ZnD Discord server here.
About Zora no Densha
Zora no Densha is a Minecraft mod that brings tracks, rail vehicles, and a lot of other railway-related features into the game. The initial idea is based off a private server project for which no suitable railway-themed modification could be found, ultimately leading to the creation of Zora no Densha.
Today, Zora no Densha brings realistic trains with high detail and great customisability into your Minecraft worlds. We are striving to increase simplicity while maintaining complexity, so everyone can enjoy a realistic mod without having to worry about too much complication. That's what we are working on - today, tomorrow, and in years to come.
Quick Information:
Tracks
Zora no Densha adds a number of different track types.
Find out about these tracks right here.
Train Controls
A list of all default train controls in Zora no Densha can be found here.
You can change the controls inside the mod's configuration menu. It is accessible via Minecraft's title screen.
Blocks and Items
See which Blocks, Fluids, and Items Zora no Densha brings into Minecraft, and view their crafting recipes.
Custom Models
If you feel creative, you can assemble your own custom trains in the Model Editor. This tutorial explains how the Model Editor works.
After you finished your model, feel free to upload it to our train-yard.
Note: You need to have an account to be able to upload your creation. Click here to sign up.
Tutorials
Installation and Configuration
A guide to help you install and configure Zora no Densha. There is also an explanation of how to change keyboard key bindings.
First Steps with Tracks and Trains
Find out how to build tracks here. Once you have some infrastructure ready, learn how to place trains right here.
Importing custom models
Find out how to import community-made models right here.
Driving Trains
Since it's a bit much to read, we split the tutorial on how to use your trains into three categories:
- a quick tutorial explaining how to actually drive trains;
- an extended tutorial explaining some advanced features of trains;
- and a short explanation of how trains are coupled together.
ZnD Releases
You can Download the newest ZnD versions here.
Stable Releases
Hint: You can download the mod .jar in the top left under the "Attachments" section!
Here you can download Stable Releases of the base mod. You can also see what has been changed in the Version History below.
Version History:
Version 0.9.0.2-HOTFIX (Download):
- Latest Stable release
- Removed various items due to instability/for future rework
- Fixed and polished everything
- A detailed changelog can be found here
Beta Releases
Hint: You can download the mod .jar in the top left under the "Attachments" section!
Here you can download Beta Releases of the base mod. You can also see what has been changed in the Version History below.
Version History:
Version 0.10.1-snapshot 101 (Download):
- Fixes diesel engines
- Improved game performance issues coming from cab internal screens
Version 0.10.1-snapshot 100:
- Implemented realistic head sway when vsync is enabled
- Updated cab screen UI to give driver a better overview
- Cab screens now are touchscreens
- Tractive effort is now calculated automatically based entirely on vehicle mass (THIS MAY BREAKE EXISTING MODELS - to fix this, correct the vehicles mass using „initial mass“ in the fullscreen editor)
- Implemented new block „signal panel“ for manual path input/control and autodrive debugging (WIP)
Version 0.10.1-snapshot 11:
- Fixes and changes to the fullscreen modeler
Version 0.10.1-snapshot 9:
Featureupdates:
- Replaced the small model editor with the fullscreen model editor
Bugfixes:
- Fixed a bug, which made the game unresponsive, whenever a model with the container part and an image on that was loaded
- Fixed a bug, which caused the game to crash, when one printed a preset
Version 0.10.1-snapshot 7 (mostly stable):
Featureupdates:
- Added Signalpack support
Bugfixes:
- Fixed trains colliding with other trains when going around corners (not world yet)
- Fixed train hitboxes
- Fixed bugged speed sign icons
- Some changes to signalling to ensure two trains can't crash head-on in bidirectional areas
Version 0.8-snapshot Nov2015:
- This version is way too old to tell you what has been fixed and what not
- To my experience it is actually somewhat stable, but probably only use it to "enrich" the Stable release
- Works with Stable Version 0.9.0.2 HOTFIX
Issues & Bugs
Here you can find known bugs and how to fix them.
Known Bugs & Issues
Imagine if every time you ran your microwave, your dishwasher's settings changed from Normal Cycle to Pots and Pans.
In software, this kind of thing goes on all the time.
Charles Scalfani: Why Functional Programming should be the future of software development. IEEE Spectrum. 2022.
This page contains a list of currently known bugs and possible interrim solutions. Please check whether your bug is already listed here or has already been reported through the ZnD Discord-Server or the comments section of this page: Bug Center
Terminology:
| Term | Description: |
| BCOG | A crash chunk. |
Known Bugs & Issues:
Tracks:
| Title: | Vanishing switches |
| Issue Description: | Switches can randomly break. |
| How to reproduce: | Unknown |
| Possible Fix: | Replace broken switches. Redoing paths is not necessary. |
Trains:
| Title: | Stuck bogies when releasing breaks too soon |
| Issue Description: | Sometimes locomotive bogies get stuck when you manage to release the breaks too early |
| How to reproduce: | Quickly loosen breaks after entering train. |
| Possible Fix: | Replace locomotive. |
| Title: | Chunk crash in single player after placing too long trains and rejoining world |
| Issue Description: | In singleplayer, coupling too long trains can still cause crash chunks but not immediately. |
| How to reproduce: |
|
| Possible Fix: | External world editor or teleporting player + removing chunk via world edit |
Autodrive:
| Title: | Duplicating Autodrive Trains |
| Issue Description: | ZnD NG server experiences duplicating autodrive trains after server restart. |
| How to reproduce: | Unknown/Unable to reproduce on testserver. |
| Possible Fix: | Destroy duplicated trains. |
MTCS/Signal Panel:
There are currently no known bugs/issues.
Signals:
There are currently no known bugs/issues.
Fullscreen Editor:
| Title: | Editing on multiplayer server may result in a BCOG |
| Issue Description: | Editing on multiplayer server may result in a BCOG |
| How to reproduce: | -- |
| Possible Fix: |
|
Bug Center
This is where you can report bugs you found. Feel free to either use the comment tool on this page to create a new thread or post your bug report on the ZnD Discord-Server.
Before posting a bug please first check, whether your bug is already known by searching existing comments/threads on this page, on the known bugs/issues page or on the ZnD Discord Server.
When posting your bug/issue please try to use this form.
| Title: | <A short informative title> |
| Issue Description: |
<A longer description of what exactly happened or you did before the bug occured - ideally with pictures or video of the bug> |
| How to reproduce: | <Steps how to reproduce the bug> |
| Possible Fix: | <Only necessary if you already happened to find a solution> |
Hint: You need to be logged in to be able to comment.
Crafting & placing Tracks
Crafting Tracks
Tracks are built in several steps and require varying numbers and types of items, depending on the track you're trying to build. Here's the process of creating your railways, split into a number of steps:
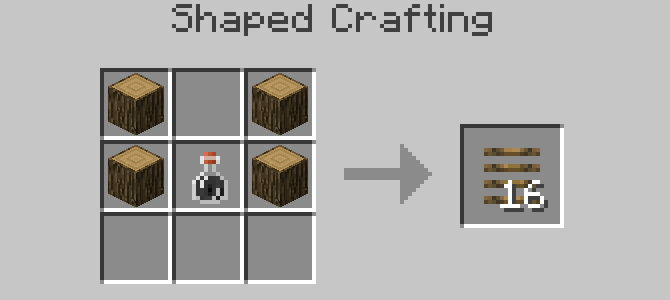
1. Getting the Blueprint
Open the Engineer's Table GUI and switch to the first tab, if you aren't already there. The tracks tab is the left-most tab, the one with the rail.
Use the items on the right to place the track recipe into the 5x5 grid on the left. Then, put paper and ink into the two slots below the 5x5 grid. If your shape is valid, it'll print the track's blueprint. The printing process is indicated by the triangular shape going white. Once finished, you can take the blueprint out from the large slot in the center.
All track blueprints can also be found in the Zora no Densha General Creative Tab.
2. Placing the guides
With your blueprint in hand, point at the block you'd like to place the track on. If the track can be placed (i.e. if there are no obstructions, and the ground is even), a transparent, blue ghost-track will appear. Right-click to confirm and to place the guides. If successful, the track's hitboxes will appear, along with red-white stilts marking the track's path.
While the track shows guides, it is safe to dig and remove the ground below. Removing ground from below (partially) finished tracks will destroy them.
If you misplace a blueprint, you can break it by hand if it's empty. If you want to take away a component, you'll have to break it with a crowbar.
3. Finishing the track
Gather and apply all items of the track. As rule of thumb, each track needs as many Track Beds, Clamps, and Rails as it is meters long. I.e. a straight track of 8 meters length will need 8 Track Beds, Clamps, and Rails. Special tracks might require additional items. Some tracks can also receive an upgrade with Crossing Plates.
Apply track parts in following order:
- Track beds first
- clamps follow
- rails finish.
Crossing plates and any additional items come last.
Note that an exception is the maintenance track; it requires Stilts instead of Track Beds.
Demolishing
To remove a track while retaining its items, hit the track with a Crowbar. Any other item will break the track.
Extra: Copying tracks while in creative mode
Using the Trackman's Tool, it is possible to copy finished tracks.
Right-click the track you'd like to copy. A chat message should appear to confirm that the track was successfully copied. You can now create infinite copies of the track.
Note: As tracks are a Tile Entity, it is generally unsafe to copy them using WorldEdit or similar tools. We do not take responsibility in case of crashes or any other unexpected behaviour that resulted from track copying.
Types of Tracks
Straights:
Straight Track (0°)
- Area: 1x1
- Track Beds: 1
- Fastenings: 1
- Rails: 1
- Plates: 1
Straight Track (0°,2m)
- Area: 1x2
- Track Beds: 2
- Fastenings: 2
- Rails: 2
- Plates: 2
Straight Track (0°, 4m)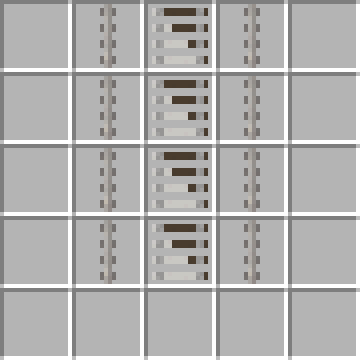
- Area: 1x4
- Track Beds: 4
- Fastenings: 4
- Rails: 4
- Plates: 4
Straight Track (0°, 8m)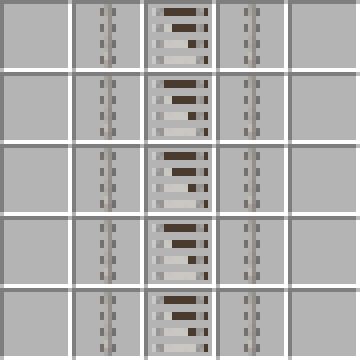
- Area: 1x8
- Track Beds: 8
- Fastenings: 8
- Rails: 8
- Plates: 8
Straight Maintenance Track (0°)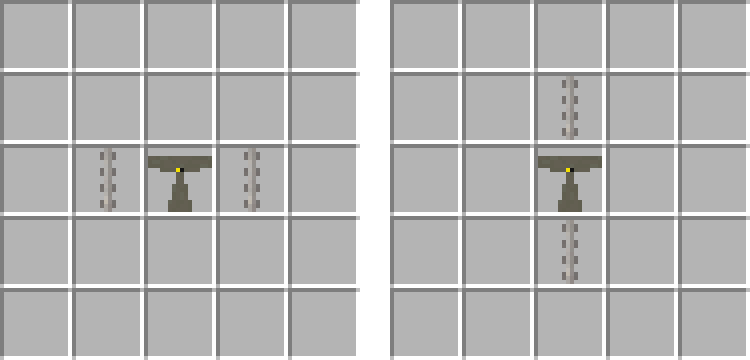
- Area: 1x1
- Stilts: 1
- Fastenings: 1
- Rails: 1
Straight Track (11°)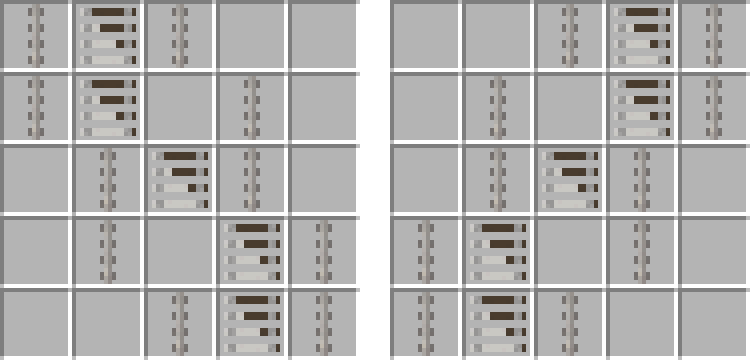
- Area: 2x5
- Track Beds: 5
- Fastenings: 5
- Rails: 5
- Plates: 5
Straight Track (18°)
- Area: 2x3
- Track Beds: 3
- Fastenings: 3
- Rails: 3
- Plates: 3
Straight Track (45°)
- Area: 1x1 (Overhanging)
- Track Beds: 1
- Fastenings: 1
- Rails: 1
- Plates: 1
Straight Track (45°,2m)
- Area: 1x2 (Overhanging)
- Track Beds: 2
- Fastenings: 2
- Rails: 2
- Plates: 2
Straight Track (45°,4m)
- Area: 1x4 (Overhanging)
- Track Beds: 4
- Fastenings: 4
- Rails: 4
- Plates: 4
Straight Track (45°,8m)
- Area: 1x8 (Overhanging)
- Track Beds: 8
- Fastenings: 8
- Rails: 8
- Plates: 8
Slope Track (10m)
- Area: 1x10
- Track Beds: 10
- Fastenings: 10
- Rails: 10
Slope Track (16m)
- Area: 1x16
- Track Beds: 16
- Fastenings: 16
- Rails: 16
Curves:
Curve Track (0° to 11°)
- Area: 2x10
- Track Beds: 10
- Fastenings: 10
- Rails: 10
Curve Track (11° to 18°)
- Area: 2x4
- Track Beds: 4
- Fastenings: 4
- Rails: 4
Curve Track (18° to 45°,6m)
- Area: 4x6
- Track Beds: 6
- Fastenings: 6
- Rails: 6
Curve Track (18° to 45°,10m)
- Area: 4x10
- Track Beds: 10
- Fastenings: 10
- Rails: 10
S-Curve Track (0°, 8m)
- Area: 2x8
- Track Beds: 8
- Fastenings: 8
- Rails: 8
Switches:
Switch Track (0° to 0°/11°)
- Area: 2x10
- Track Beds: 7
- Fastenings: 11
- Rails: 11
Switch Track (11° to 11°/0°)
- Area: 2x10
- Track Beds: 7
- Fastenings: 11
- Rails: 11
Switch Track (0° to 11°/0° - 3-way)
- Area: 3x10
- Track Beds: 7
- Fastenings: 11
- Rails: 11
Crossings:
Cross Track (0°)
- Area: 1x1
- Track Beds: 1
- Fastenings: 1
- Rails: 1
 Cross Track (0°/11°)
- Area: 1x10
- Track Beds: 11
- Fastenings: 11
- Rails: 11
Cross Track (11°/11°,10m)
- Area: 1x10
- Track Beds: 11
- Fastenings: 11
- Rails: 11
Cross Track (11°/11°,5m)
- Area: 1x5
- Track Beds: 6
- Fastenings: 6
- Rails: 6
Cross Track (45°)
- Area: 1x1
- Track Beds: 1
- Fastenings: 1
- Rails: 1
Others:
Buffer Track (0°)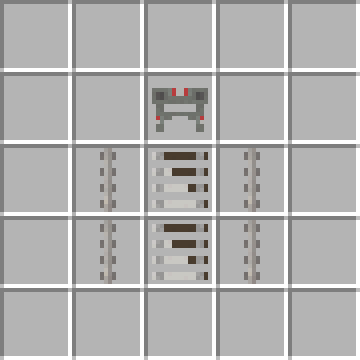
- Area: 1x2
- Track Beds: 2
- Fastenings: 2
- Rails: 2
- Plates: 1
- Buffer: 1
Buffer Track (11°)
- Area: 1x2
- Track Beds: 2
- Fastenings: 2
- Rails: 2
- Plates: 1
- Buffer: 1
Buffer Track (18°)
- Area: 1x2
- Track Beds: 2
- Fastenings: 2
- Rails: 2
- Plates: 1
- Buffer: 1
Buffer Track (45°)
- Area: 1x2
- Track Beds: 2
- Fastenings: 2
- Rails: 2
- Plates: 1
- Buffer: 1
Transition Track (0°)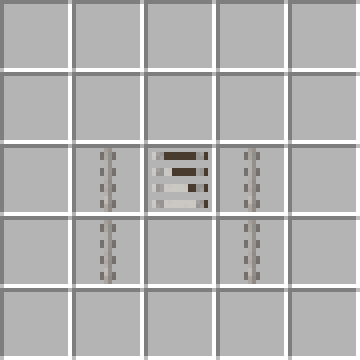
- Area: 1x2
- Track Beds: 2
- Fastenings: 2
- Rails: 2
Further Information
Maintenance Track (0°)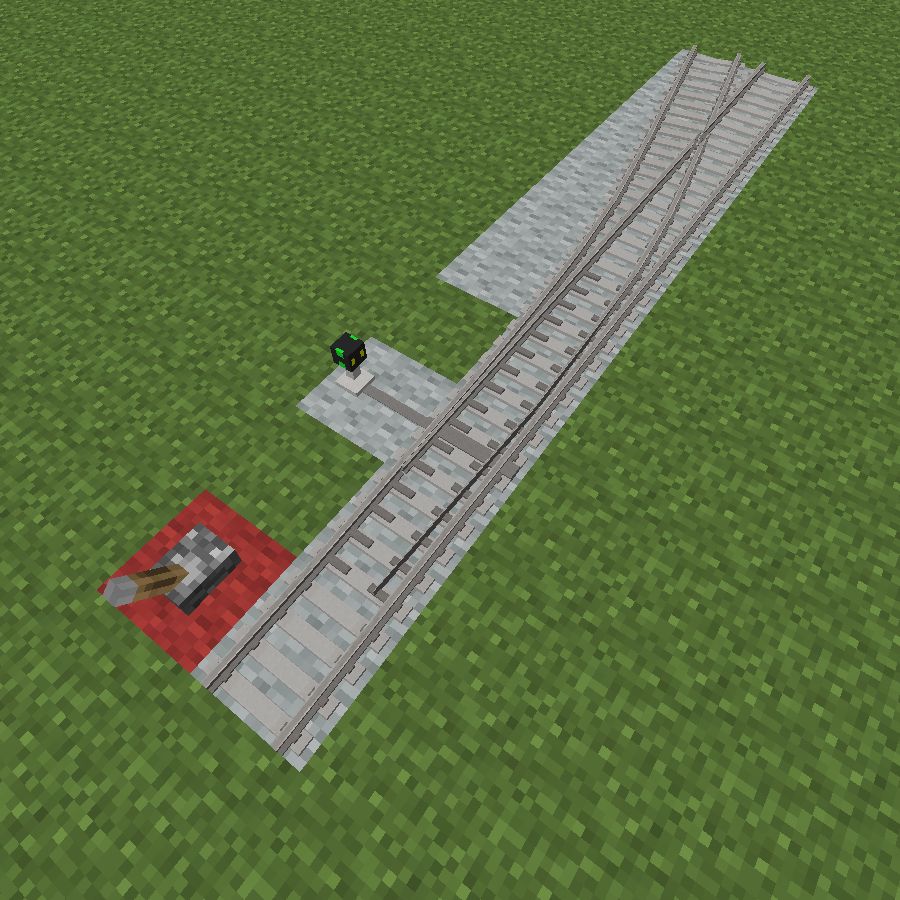
The Maintenance Track requires Stilts instead of Track Beds for construction. This track is 1 metre (= 1 block) above ground level and can be used to view a vehicle from below. Maintenance Tracks are also an essential part of the process of train creation. Right-clicking
the Maintenance Track with a crowbar hides its stilt.
Switch Tracks
To move a switch by Redstone state, remove the switching lever with the crowbar (rightclick) and apply the pulse to the origin (=source of the track) of the switch (see image on the right). Applying a Redstone pulse to the switch changes the path it is set to.
To move the 3-way switch by Redstone state, place a Redstone source on the left to set the switch to go left or place a Redstone source on the right to set the switch to go right. Only one side can be powered at a time - if both are powered the switch will revert to going straight.
Placing, coupling, driving & creating Trains
Default Key Binds (Trains)
This page contains all default train controls. They can be changed in the mod configuration, which you can access from within Minecraft's title screen by pressing on Mods and selecting Zora no Densha in the list on the left side. Once selected, press Config and enter Cab Controls.
Default Keys:
Driving:
| Key | Effect |
|---|---|
| W | Move reverser forward |
| S | Move reverser backward |
| A | Increase throttle |
| D | Decrease throttle |
| " / Ä | Increase break force |
| { / Ü | Decrease break force |
| F | Enable/disable AFB (Cruise Control) |
| R | Increase AFB speed limit |
| V | Decrease AFB speed limit |
Train Configuration:
| Key | Effect |
|---|---|
| H | External light switch (4 Modes: Off/Shunt/Rear/Front) |
| J | High Beams toggle (needs light mode: Front) |
| K | Toggle cab lights |
| L | Toggle train lights |
| 9 | Turn MTCS screen on/off (centre screen) |
| 0 | Turn MTIS screen on/off (right screen) |
| I | Unlock/Close left Doors |
| O | Unlock/Close right Doors |
| P | Decouple cab coupler (Only with Scharfenberg coupler) |
| 7 | Raise/lower back pantographs |
| 8 | Raise/lower front pantographs |
Safety:
| Key | Effect |
|---|---|
| Q | Dead Man's Switch key |
| Enter | Emergency brake |
| Space | Horn |
| 9 | Turn MTCS screen on/ off |
| 0 | Turn MTIS screen on/ off |
Destination Displays
Some vehicles have destination boards installed. These are small screens which display the destination your train is heading to. You can set the destination which should be displayed using /setdest <Line1>, <Line2>.
Usually, <Line1> is your train number or line number with destination name, and <Line2> is either a list of via's (i.e. stations the train visits) or other information.
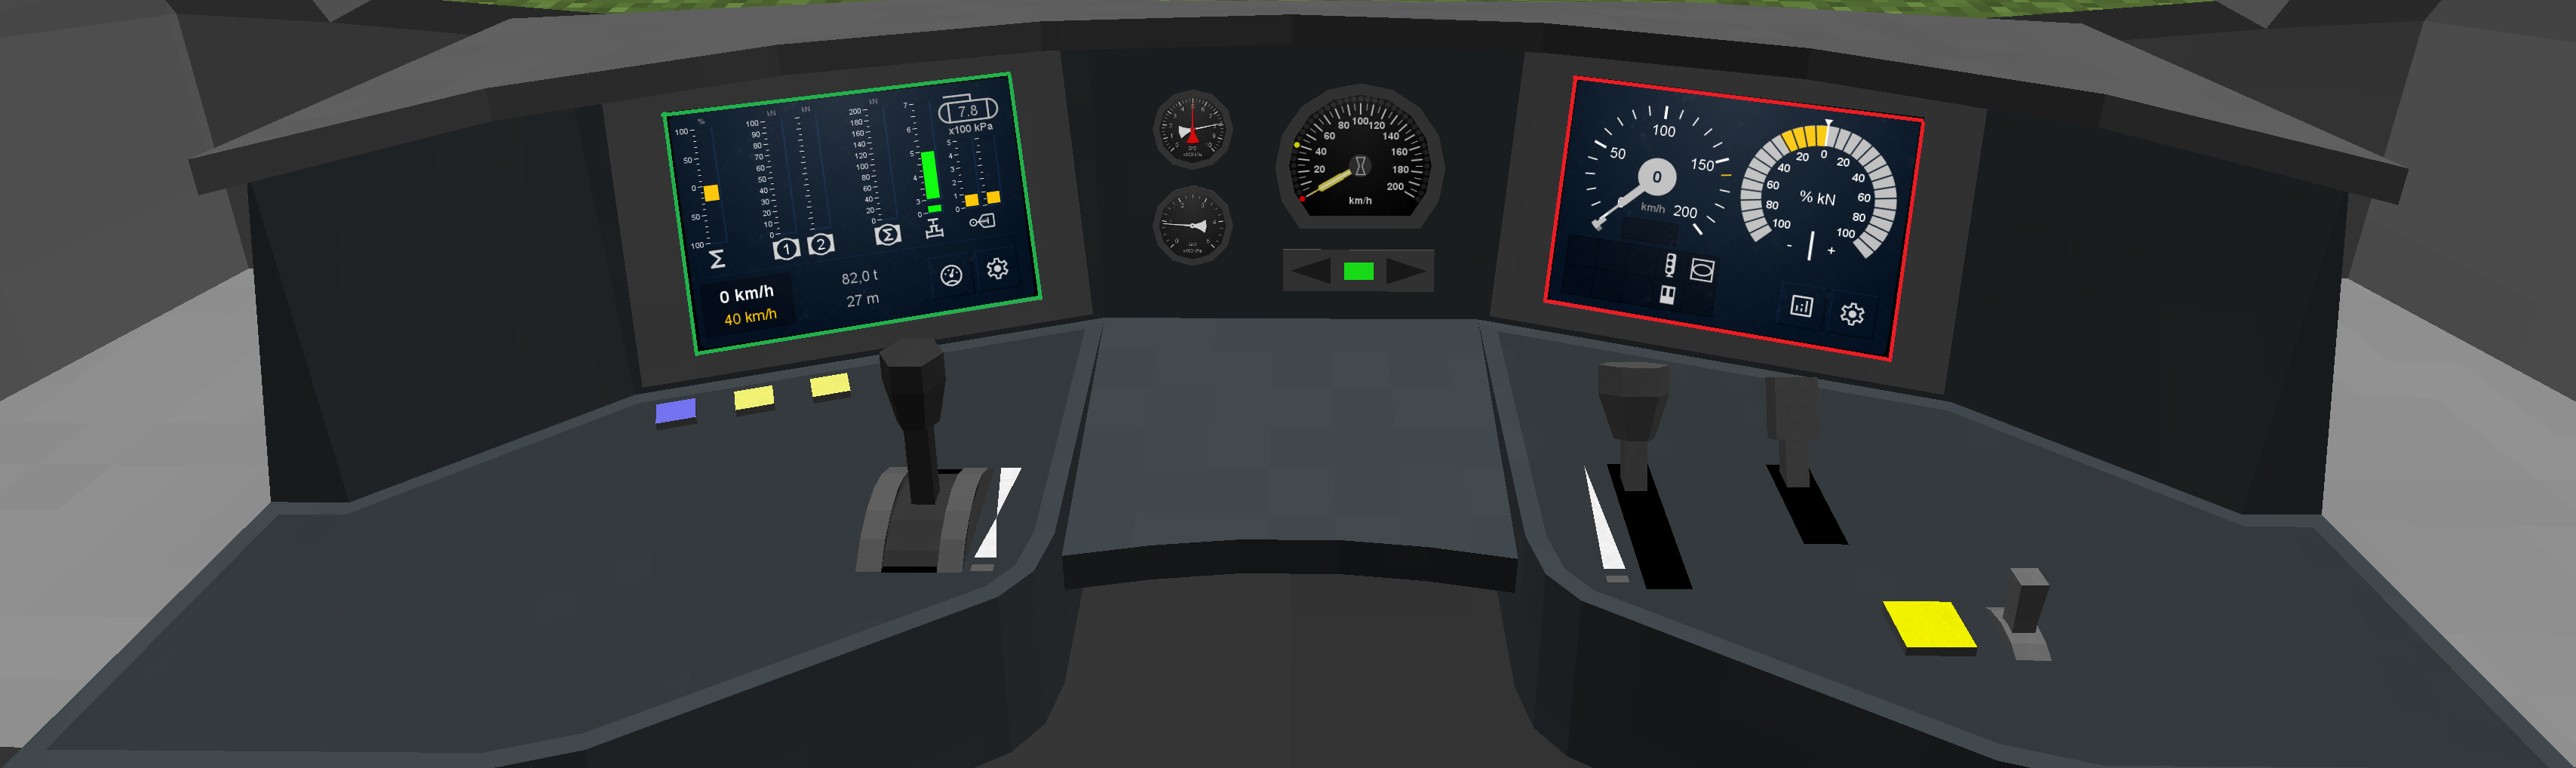
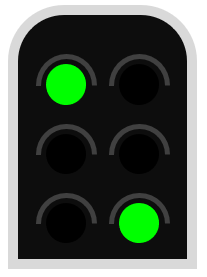
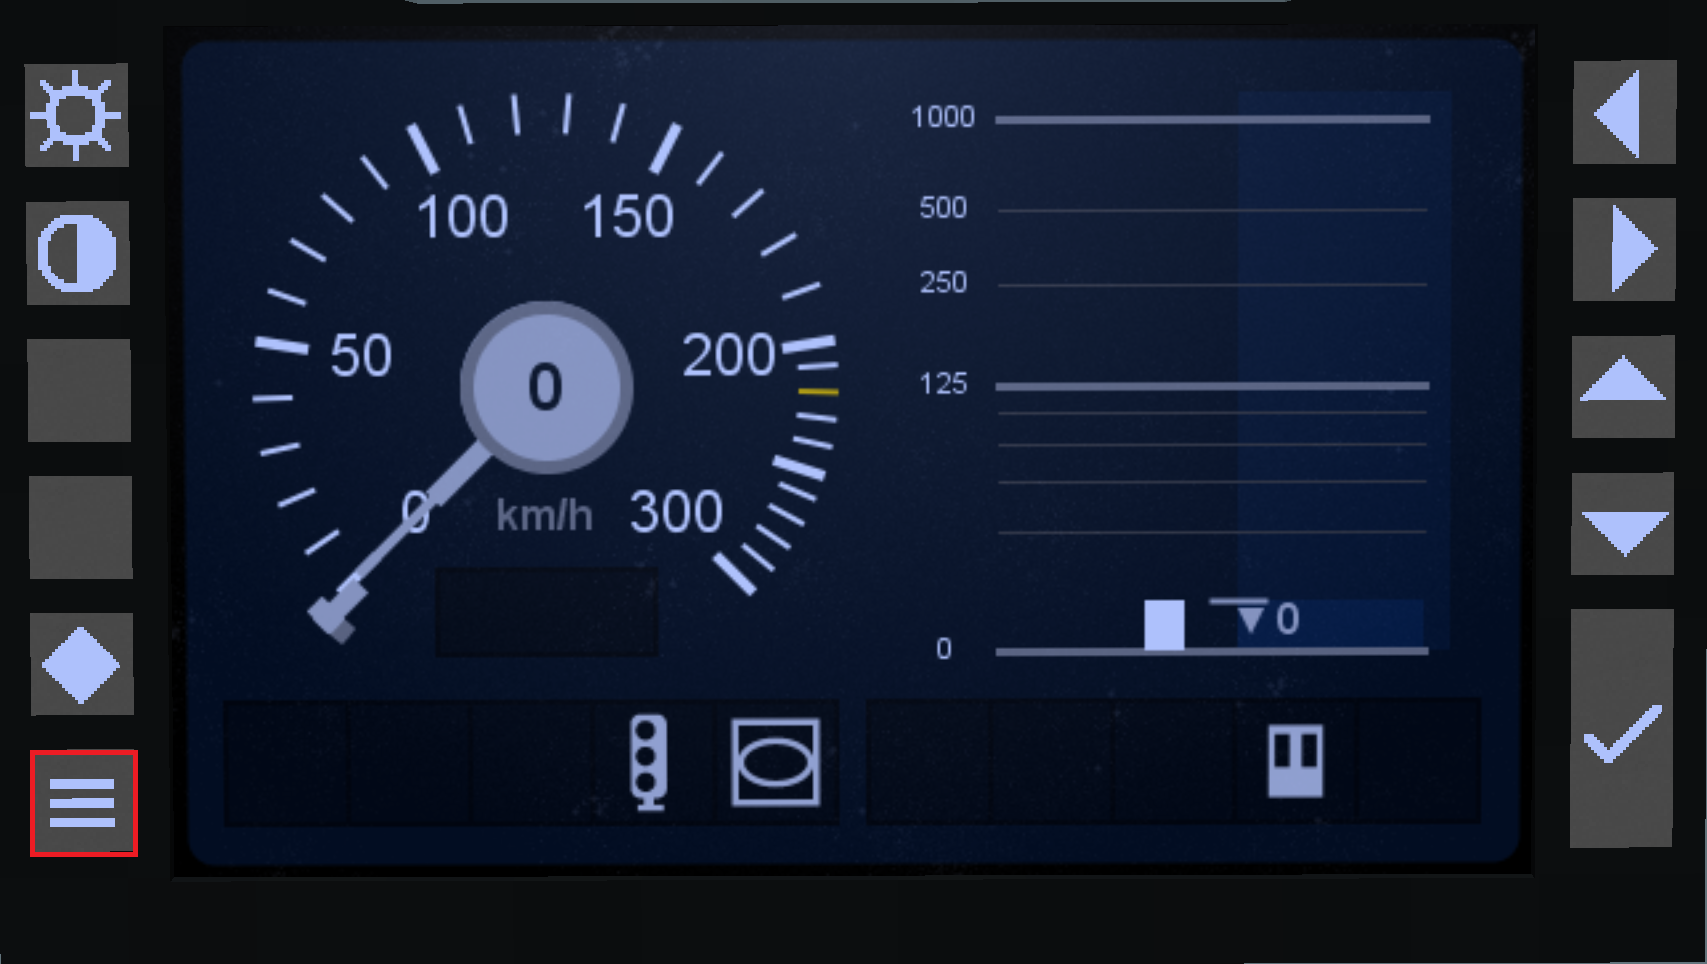
Cab Displays - MTMS & MTCS Display
ZnD trains cabs give the driver a whole lot of useful information. Part of this information system are the MTMS and MTCS display.
There currently are two different cabs in ZnD. One is the BR 101s and the other the FLIRT 3s cab.
You can see the standard driver display configuration below. The MTCS display is red and the MTMS display is green.
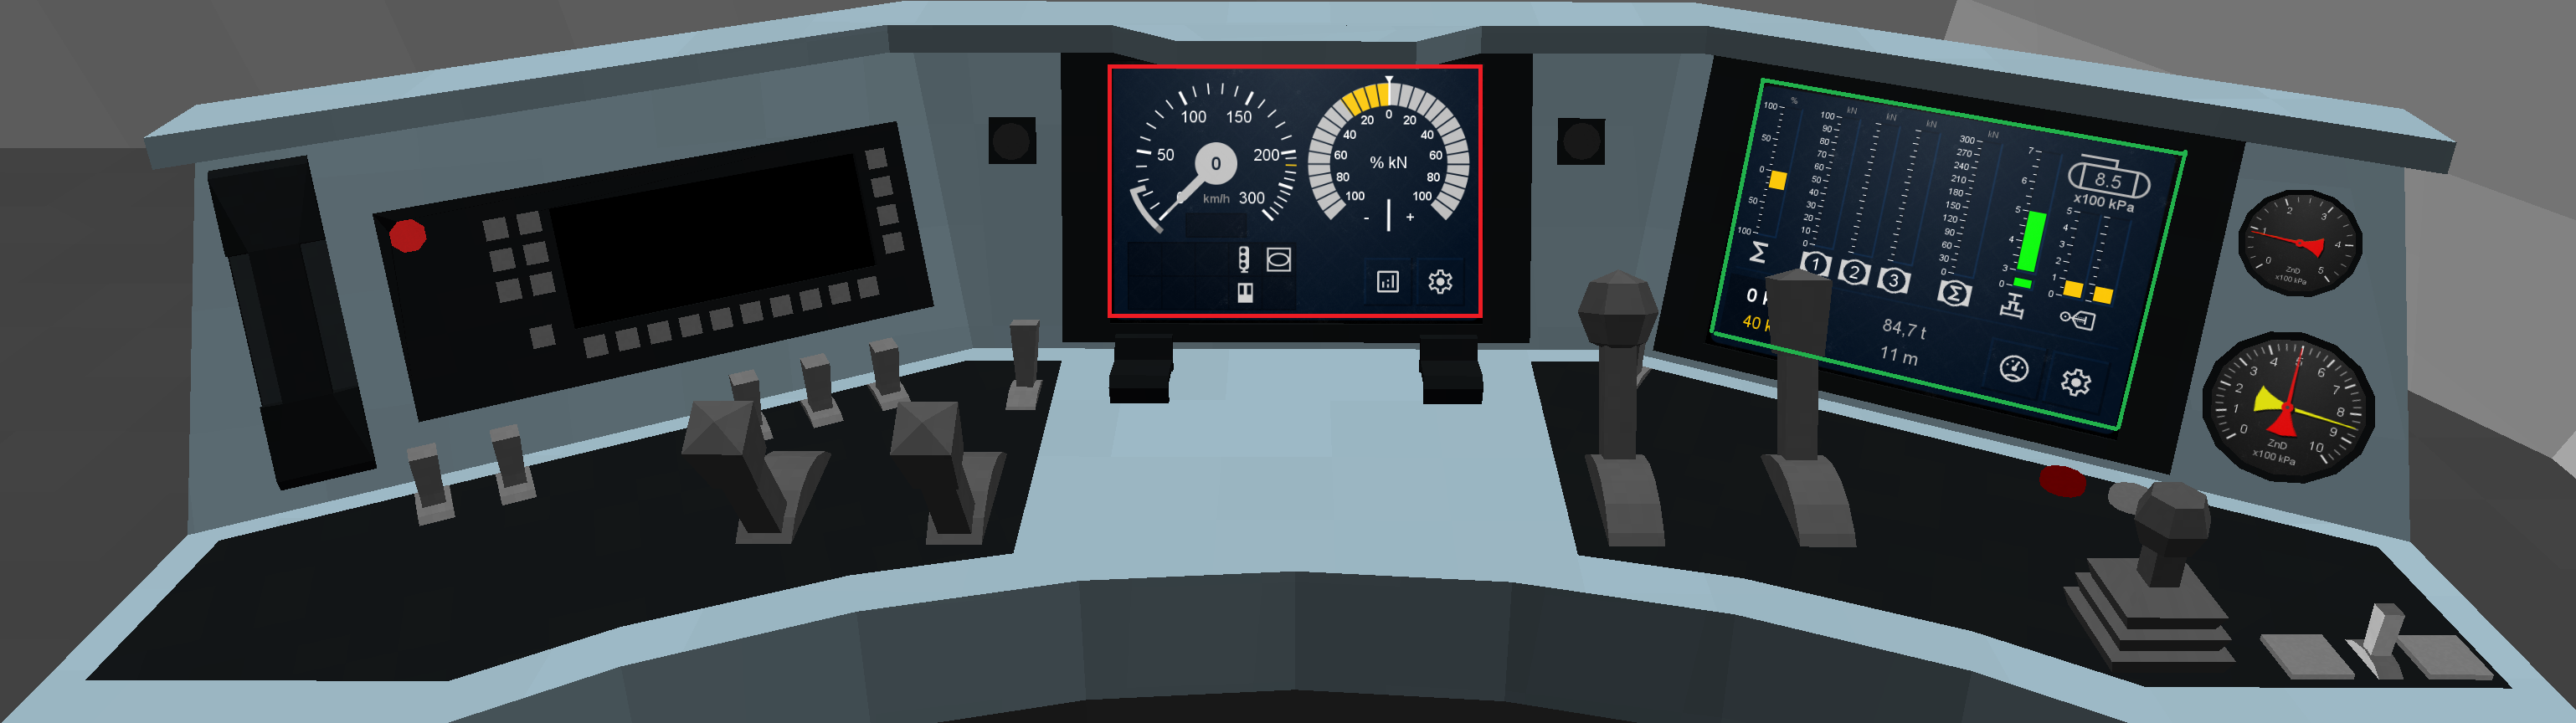
MTCS Display
MTCS is short for "Minecraft Train Control System". This is where you can view most of the immediately relevant train stats (e.g. speed, tractive effort, status bulbs). This is also where upcoming MTCS speed limits are displayed.
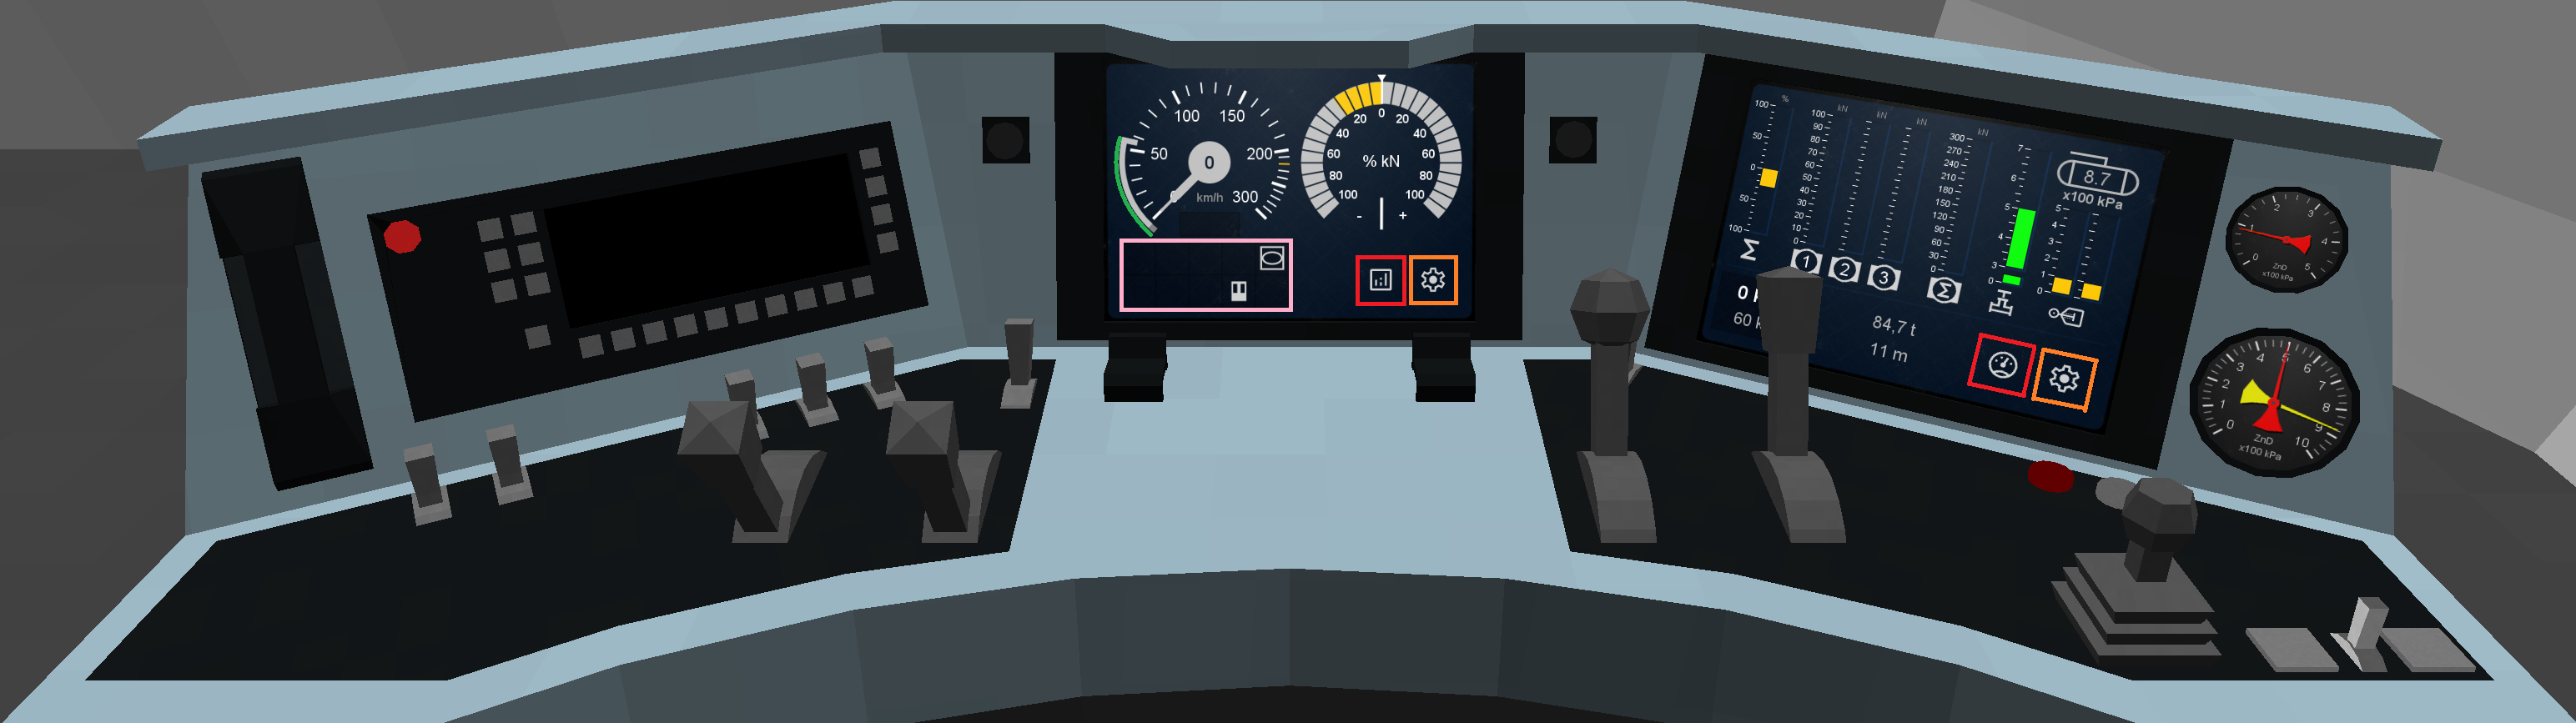
The MTCS Display consists of 3 main segments and two control buttons.
| Location/Colour | Name | Function |
| Top left dial | Speedometer | Displays the current train speed together with the currently valid MTCS speed limit. |
| Top right dial | Tractive effort | Displays the trains currently applied tractive effort or brake force. |
| Lower left/pink | Status bulbs | Displays current status messages for the train driver. This is where you can see e.g. "Sifa" or the "doors status" (open/closed). |
| Lower right/red | Switch MTMS/MTCS |
This changes the selected displays role. MTCS display becomes a MTMS display and vice versa. |
| Lower right/orange | Settings | This opens the train cabs settings. |
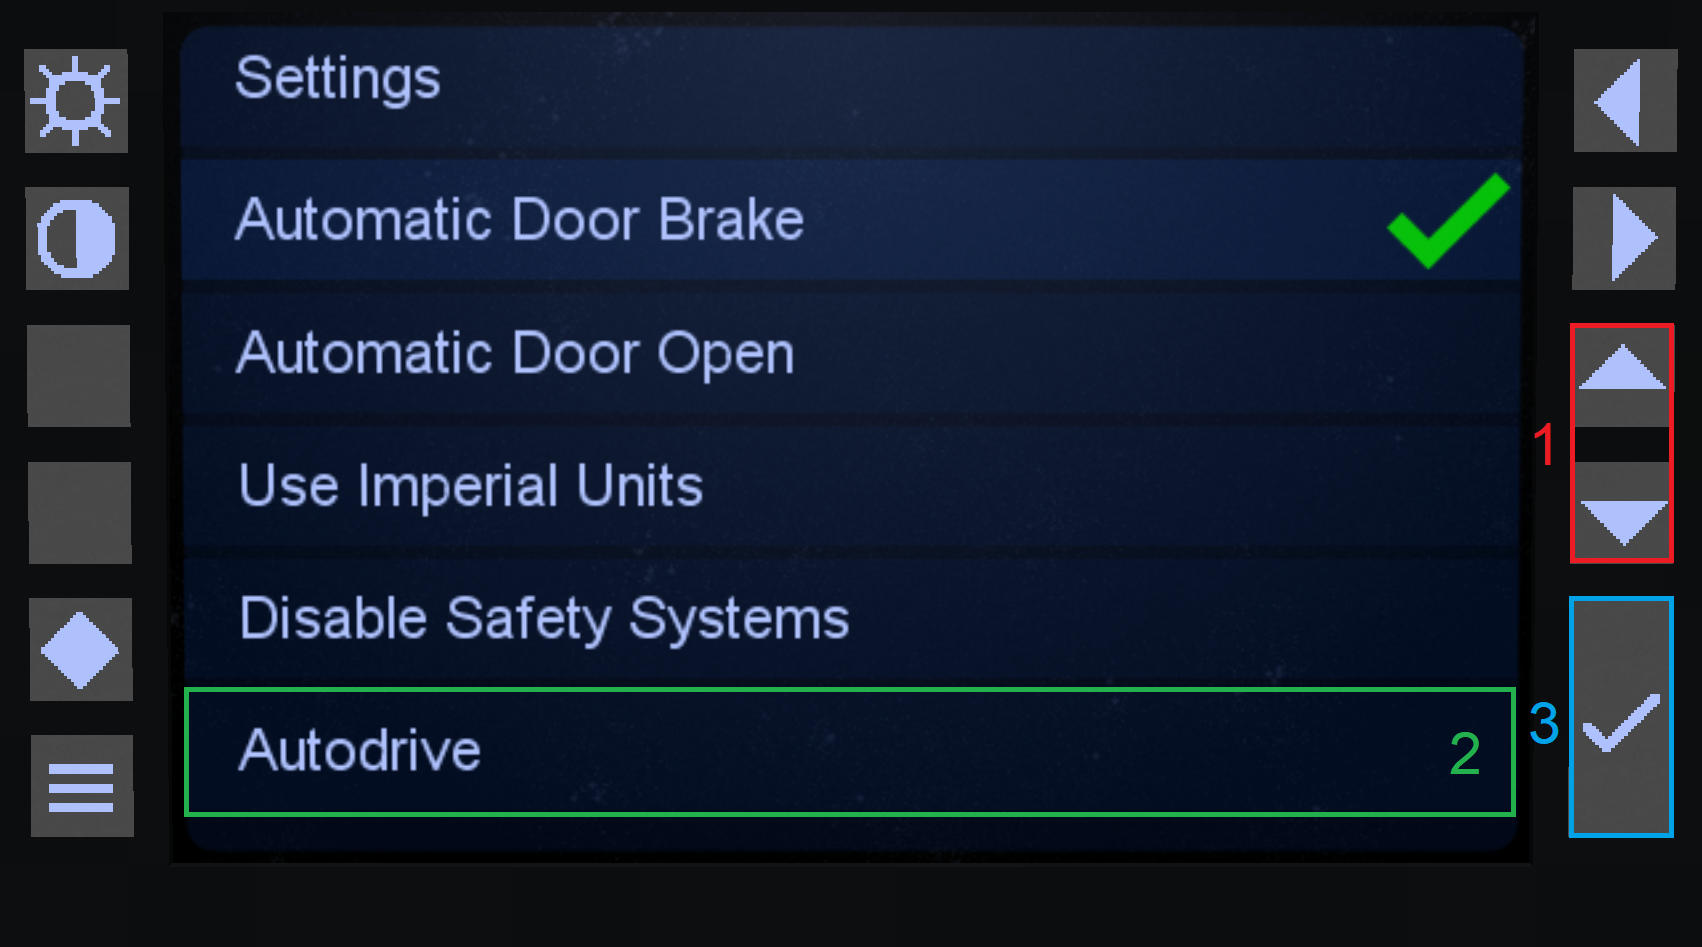
The settings page is home to the train cabs settings. This is where you can enable autodrive or make doors open/close automatically.
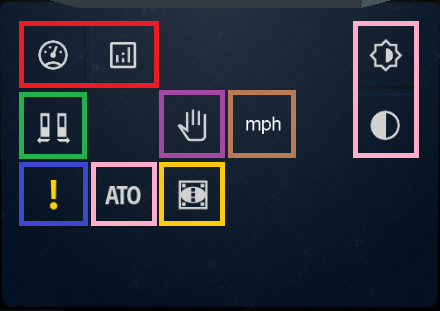
| Location/Colour | Function |
| Red | Return to MTMS/MTCS display view. |
| Green | Automatically open/close doors. |
| Blue | En-/Disable all safety systems. |
| ATO |
En-/Disable autodrive. |
| Yellow |
En-/Disable "limited supervision" mode (designed to emulate the appearance and function of ETCS's real Limited Supervision mode). Braking curves are not enforced and the current speed limit is not displayed on the screen. |
| Purple |
En-/Disable automatic brake application upon stopping. |
| Top right |
Customize display appearance (brightness - top, light/dark-mode - bottom) |
MTMS Display
MTMS is short for "Minecraft Train Management System". This is where you can view extended stats about your train.
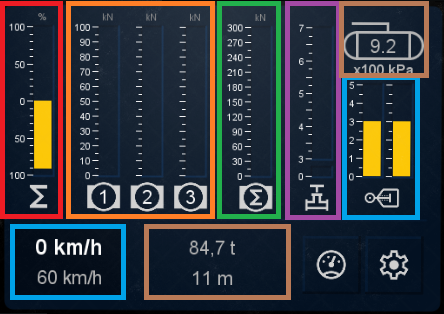
| Location/Colour | Function |
| Red | Total train power/brake power. |
| Orange | Individual engine/bogie power/tractive effort. |
| Green | Total engine/bogie power/tractive effort. |
| Purple | Brake pipe pressure (pneumatic brakes are released when this is 500 kPa). |
| Light Blue/Right |
Brake cylinder pressure (brakes are released when this is 0 kPa). |
| Brown/Right |
Air compressor/main reservoir pressure. |
| Light Blue/Left |
Top: Current train speed; Bottom: Currently active MTCS speed limit. |
| Brown/Center |
Train stats (total length and total weight). |
Driving Trains Basics
Cab overview
The Zora no Densha cab is really close to a real one. While it seems complicated, it really is simple to drive a train.
Basic Controls
You'll have to remember some basics controls which are by default:
-
W and S for the reverser (by default, the reverser is at X (locked)).
If you press W once you'll go into Backward mode (down arrow selected), one more to be in Neutral mode (N selected) and once again to go to Forward mode (up arrrow selected).
W will make you go up in the list while S will make you go down. The arrows represent the direction your train will go to. Neutral mode has no direction. -
A and D for the throttle (by default at 0 (brake released but no power)).
Pressing A will give power to your train or release your brakes. The more you press, the more power you allocate and the more acceleration your train will gain.
At the contrary, D will give less power or apply brakes. -
Q is the dead man's switch key. When you see the '!' logo on your screen and/or hear a beeping sound, you'll have to press this key.
Otherwise your train will think you're dead or AFK and will apply emergency brakes. -
Enter is the emergency brake key. When pressed, your train will decelerate quickly to a full stop.
To remove emergency brakes, set the reverser to neutral and the throttle to zero. Then press the emergency brake again until your throttle display stops blinking red. -
9 is for the MTCS screen. It turns the screen on and off.
The screen must be on if you want to drive your train. -
Space is for the horn. If there are passive animals in front of your train when driving, sounding the horn will alert them to your presence and make them move out of the way (unless they are too stupid to find a safe place, in that case they'll just get squashed).
Please note that above buttons may change depending on what you assigned them to in your configuration.
Driving Trains Advanced
If you're here, that means you've completed all the previous tutorials - well done! If that's not the case, we highly recommend you to check them.
Advanced Controls
Here are some advanced controls for you to completely enjoy the Zora no Densha driving experience:
Lighting
K toggles driving compartment light.
When enabled, this will light up the area inside the compartment and the desk/chair.
H changes the train's head light.
You switch through a list of four states; Off - Shunt - Rear - Front.
J toggles light beams for the head light.
The light beams only appear when the head lights are set to "Front".
Passenger
I (un-)locks the doors on the left side of your train.
Passengers will then be able to interact with the doors to open them and to hop in. To close the doors and lock them, press I again (it'll take some time to close with a beeping sound).
O (un-)locks the doors on the right, similar to above.
Pro-tip: When doors are unlocked, an icon will appear on the MTCS display and the door state will change on the MTIS display. The two buttons at the bottom right corner of your panel will also light up depending on which doors are unlocked.
You can use in the cab the command : /setdest <Line1>, <Line2> to set which text your train's destination boards display.
Some more info can be found here.
AFB/Cruise Control
Automatische Fahr- und Bremssteuerung, translates to automatic driving and braking control - or simply Cruise Control.
This system is used to assign a maximum speed for the train.
When enabled, the train will not go higher than the assigned speed thanks to an automatic control of the brakes.
Please note that this mode does not automatically apply throttle - you will need to set the throttle to a level which will allow the train to accelerate.
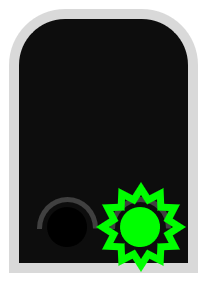
F is used to toggle AFB. It'll show a little yellow diamond on your speedometer at the speed limit you've assigned (default 40 km/h).
The speed limit assigned is also shown on the MTIS display.
R increases the speed limit by 5 km/h.
V decreases the speed limit by 5 km/h.
Others
7 and 8 control pantographs by either extending or retracting the back or front pantographs, respectively.
In future versions, pantographs will be required to draw power from overhead lines. Currently, they serve only cosmetic purposes.
P decouples the vehicle in front of you. This only works with Scharfenberg couplings, though.
Coupling Mechanics
Zora no Densha currently comes with 3 different couplers, all of which have their own unique behaviour and functionality.
Screw and Chain coupler
The most primitive type of coupling, a screw and a chain. These are controlled manually.
To couple two vehicles equipped with these couplers, put them as close as possible then Shift + RMB on one of the couplers to link them.
You'll hear a sound and visually see them attached.
To decouple, Shift + RMB on any of the two couplers. You'll hear a sound and visually see them detached.
Janney coupler
A more advanced semi-automatic coupler usually seen on freight trains.
To couple two vehicles equipped with these couplers, bump them into each other. They'll couple automatically (a sound will be played but can't be heard if too far). You'll visually see a change in the coupler model, with the pin inside.
Pro-Tip: If you have a long train to couple use the Train length number on the MTIS display to check if a cart has been coupled.
To decouple, Shift + RMB on either coupler. You'll hear a sound and see the pin out.
Scharfenberg coupler
A modern automatic coupler mainly used on passenger EMU/DMUs.
To couple two vehicles equipped with these couplers, bump them into each other. They'll couple automatically. You'll visually see a change in the coupler model with the electric boxes that connect, and a sound will be played.
To decouple, you have two options. If you want to decouple the cart attached to the cab, press the coupler key (K by default). For the others, a Shift + RMB on the coupler will be necessary.
The Model Editor/Creating Custom Models
Zora no Densha adds the ability to assemble and configure a rail vehicle from a set of installed parts. Assembly of rail vehicles happens in the Engineer's Table.
Tipp: Please keep in mind that ZnD currently allows a max. amount of 500 individual parts per preset.
Opening the Model Editor
Place an Engineer's Table and right-click it to open its GUI. In the GUI, select the Trains tab by clicking onto the center icon on the top right (the icon that shows the blue locomotive and the white passenger car). The GUI will change appearance.
GUI Elements
| Position | Element | Short Description |
|---|---|---|
| Top-left corner | Model Editor Window | View the vehicle you're editing, interact with it inside the window using your mouse/ touchpad. |
| Center-right | Vehicle parts and saved Presets | Add and (de-)select vehicle parts or load and export Preset files. Scroll through all pages by clicking the + and - buttons above. |
| Center-left, below Model Editor Window |
Input slots |
Input slots for Black Dye and Paper. These slots have to be filled in order for a Blueprint to be printed. |
|
Bottom-left (if selection isn't empty) |
Selection and Pivot data |
View and change the average data of the selection's elements, such as average offset and rotation. Set the Pivot's position. |
|
Bottom-right (if selection isn't empty) |
Selection index data |
View and change an individual part's data, such as offset, scale, rotation or color. Some parts might have additional fields that can be changed. Scroll through the selection's indices by clicking the + and - right next to the index number. |
Keyboard Shortcuts
Please note that following keyboard shortcuts assume that you use default settings; the respective key might differ depending on your settings.
| Key/Shortcut | Function | Short Description |
|---|---|---|
| CTRL+C | COPY selection |
Copy the selection into the clipboard. If the parts limit is reached this will not be possible anymore. |
| CTRL+V | PASTE selection |
Paste the clipboard. If the parts limit is reached this will not be possible anymore. |
| CTRL+Z | UNDO action | Undo your previous action. |
| G | MOVE selection | Grab and move the selection using your mouse. While grabbing, press X, Y or Z to move along a specific axis. |
| R | ROTATE selection | Rotate the selection along the view axis using your mouse. While rotating, press X, Y or Z to rotate about a specific axis. Change the Transformation Mode to rotate about local origin, selection center, or pivot point. |
| S | SCALE selection | Scale the selection in all dimensions using your mouse. While scaling, press X, Y or Z to scale along a specific axis. |
| X | DELETE selection | Remove the selection from the Model Editor. |
| 5 | Toggle orthographic/ perspective view |
Press to switch between orthographic and perspective view mode. |
|
8 |
Set camera angle - View along +X |
View the model's rear. |
| 2 |
Set camera angle - View along -X |
View the model's front. |
| 3 |
Set camera angle - View along +Y |
View the model's bottom. |
| 9 |
Set camera angle |
View the model's top. |
| 6 |
Set camera angle |
View the model's left side. |
| 4 |
Set camera angle - View along -Z |
View the model's right side. |
Model Editor Options (Drag down menu)
Right-click in Model Editor Window to open.
| Option | Short Description |
| Clear model | Remove all vehicle parts. Leaves the entire Model Editor window blank. |
| Save as Preset | Save the model as Preset file. |
| Toggle floor grid | Click to (de-)activate the floor grid displayed in the Model Editor window. |
| Transformation mode | Click to switch transformation mode (applies to rotation). Switches between individual origins, selection center, and pivot point. |
|
Orthographic/ Perspective view |
Click to toggle orthographic/ perspective view. Will change the camera's projection mode. |
| Toggle pivot | Toggles the pivot's size. |
| View in world | Click to toggle rendering in a small scene. Disables pivot and floor grid. |
| Set initial mass | Click to set a value to either increase your trains mass (positive value) or reduce its mass (negative value) |
Vehicle Part Options (Drag down menu)
Right-click on any vehicle part icon on the center-right of the Model Editor to open.
| Option | Short Description |
| Add to model | Adds the selected part to the model's center with default settings. |
| Deselect all | Removes all vehicle parts of the selected type from the selection. |
| Select all | Clears the selection, then adds all vehicle parts of the selected type to the selection. |
Preset Options (Drag down menu)
Right-click on any Preset icon on the center-right of the Model Editor to open.
| Option | Short Description |
| Load Preset |
Load the selected Preset. If there is another model in the Model Editor, it will ask to save. Clicking "No" will directly load the model without saving, clicking "Yes" will open the Preset save prompt. Press ESCAPE on your keyboard to cancel. |
| Prints the selected Preset as Blueprint. Requires the input slots to be filled. | |
|
Export as file (If not exported) |
Creates a Preset file in your Add-Ons directory. Use that file to share your Preset. |
|
Remove Preset (If not exported) |
Deletes the Preset forever. This cannot be undone! |
|
Remove from Add-Ons (If exported) |
Deletes the Preset from your Add-Ons directory forever. This cannot be undone! |
|
Move to begin (If not exported) |
Moves the Preset to the first index of Presets. The first index will be rendered on top of the Engineer's Table. |
Assembling and editing vehicles
In the Model Editor, either load a Preset and edit it or start off with a clear model. Add Vehicle Parts and customise them to your taste. Once you are finished, save your glorious work as a Preset.
Printing vehicles
Right-click a Preset in the Engineer's Table GUI to print it. Remember to fill both input slots with Black Dye and Paper.
Blueprints have infinite uses. Right-click with a Blueprint in the center of a Maintenance Track section that is at least as long as the vehicle you're going to create. If the vehicle doesn't spawn, the track might be too short, or there might be blocks or other things obstructing the vehicle.
If the vehicle was successfully spawned, a transparent "ghost" model will be shown. (Please note: This will spawn the vehicle instantly, if instant-spawning in creative mode is enabled.) To finish the vehicle, apply Vehicle Part items to all ghost parts, until all parts appear. If you decide not to finish a vehicle, simply whack it and it'll drop all applied parts. Once you are sure that you've applied all parts, hit the vehicle to drop it as item. If you haven't forgotten to apply any parts, the vehicle will properly drop as item, if the respective setting was enabled in your mod's configuration. You can use the finished vehicle immediately.
Exporting and importing Preset files
Export a Preset by right-clicking it in the Model Editor and selecting "Export as file". A file will automatically be created inside of your Zora no Densha/ directory. You can copy this file and share it with whomever you like.
Import a Preset by dropping a Preset file in your Zora no Densha/Add-Ons/ directory. After you restarted your game, the new file will be shown in the Model Editor.
Porting Trains to newer ZnD versions (from v0.9.X to v0.10.X)
The new ZnD-Version (v0.10.X) sadly has the side effect that most locomotives/EMUs/DMUs made in v0.9.X are not capable of driving on their own, when placed on a track. To better understand this guide, you can read this article about the model editor.
To make them drive again, you’ll have to edit the model from the old version and make a few modifications:
- Add Compressor Part:
v0.10 introduces a new (air) breaking system because of which ever locomotive hast to have a compressor. Just add it and move it to an offset position inside the trains body. - Connect bogies with the engine:
Click on every bogie and change the value of the setting “Has Engine?” from false to true. - Correct Tractive Effort:
While in the bogies, change the value of the setting “Tractive Effort” to the desired (higher) value.
Tractive effort must NOT be 0! - (Optional) Turn off Hitboxes:
If the train still won’t drive you may have to turn off some hitboxes of parts near the track/ground. To turn off a Hitbox click on the part and look for the setting “hitbox?”. Then change its value from true to false.
Porting models from previous snapshots to snapshot 100:
As there have been changes to the way ZnD handles tractive effort (as of snapshot 100, tractive effort is calculated automatically), it may be that models made using previous snapshots could behave unexpectedly (f.ex. failing to accelerate in an adequate timely manner).
This is most likely due to wrongly configured vehicle mass. You need to change this to the real world value (in metric tonnes).
- Open the vehicle/wagon in the editor
- Change the models „initial mass“ attribute:
To change total vehicle weight to match the real value, insert a value calculated as follows: -
Formula: initial mass = <real_mass_value> - <current_model_mass>
Don‘t forget to save your work after you finished editing the vehicle!
If you followed this guide completely, your train should drive normally again.
Getting, importing custom models and placing trains
Zora no Densha adds a custom 3D editor with a large number of parts to create/customize your own trains. You can also print directly premade presets provided by the mod.
Disclaimer: The Model Editor will be tackled in another advanced tutorial
Pro-Tip: Train presets can be found in the Zora no Densha preset creative tab.
Custom models need to be placed inside the /.minecraft/mods/Zora no Densha/AddOns folder in order to be recognized by the game. Newly inserted custom models will appear in the Train tab of the old Editor/Fullscreen Editor after restarting the game
Print a train blueprint
Open your engineer's table and head to the train tab. Here you can see a bunch of presets as well as some train parts.
We'll print a BR 101 in this tutorial, Zora no Densha's iconic train.
Deprecated with the new Fullscreen Editor: Put a piece of paper and an ink sack into the corresponding slots then right click on the BR 101 and select "print". This will print a BR 101 blueprint.
Crafting a train
Now that you have your blueprint, you'll need some maintenance tracks to place it.
Pro-tip: When in creative mode, maintenance tracks are not required to spawn blueprints.
If you can't place the blueprint, you may need to add more Maintenance tracks, especially for longer trains like the Stadler FLIRT 3.
Now that your blueprint is placed, you can see some blue boxes have appeared. These represent all the individual parts which must be added to the train to complete it. As parts are added to the train, you will see the parts appearing in place of the blue boxes.
You can shift right click the placed blueprint to check what parts need to be placed.
Now, craft all the parts needed and right click with them on the blueprint, it will place them. Once all the parts are in, the train is finished and ready to go!
Moving the finished train
If you have the config option "VERIF Do Train Drops" (enabled by default), you can break your train and retrieve it as an object that you can place on any other tracks.
If you don't have this config activated, breaking the train will destroy it! You have to drive it now (if it's a locomotive) or shunt it.
Magnets, Paths & Signals
Here you can learn everything about the built in signaling system!
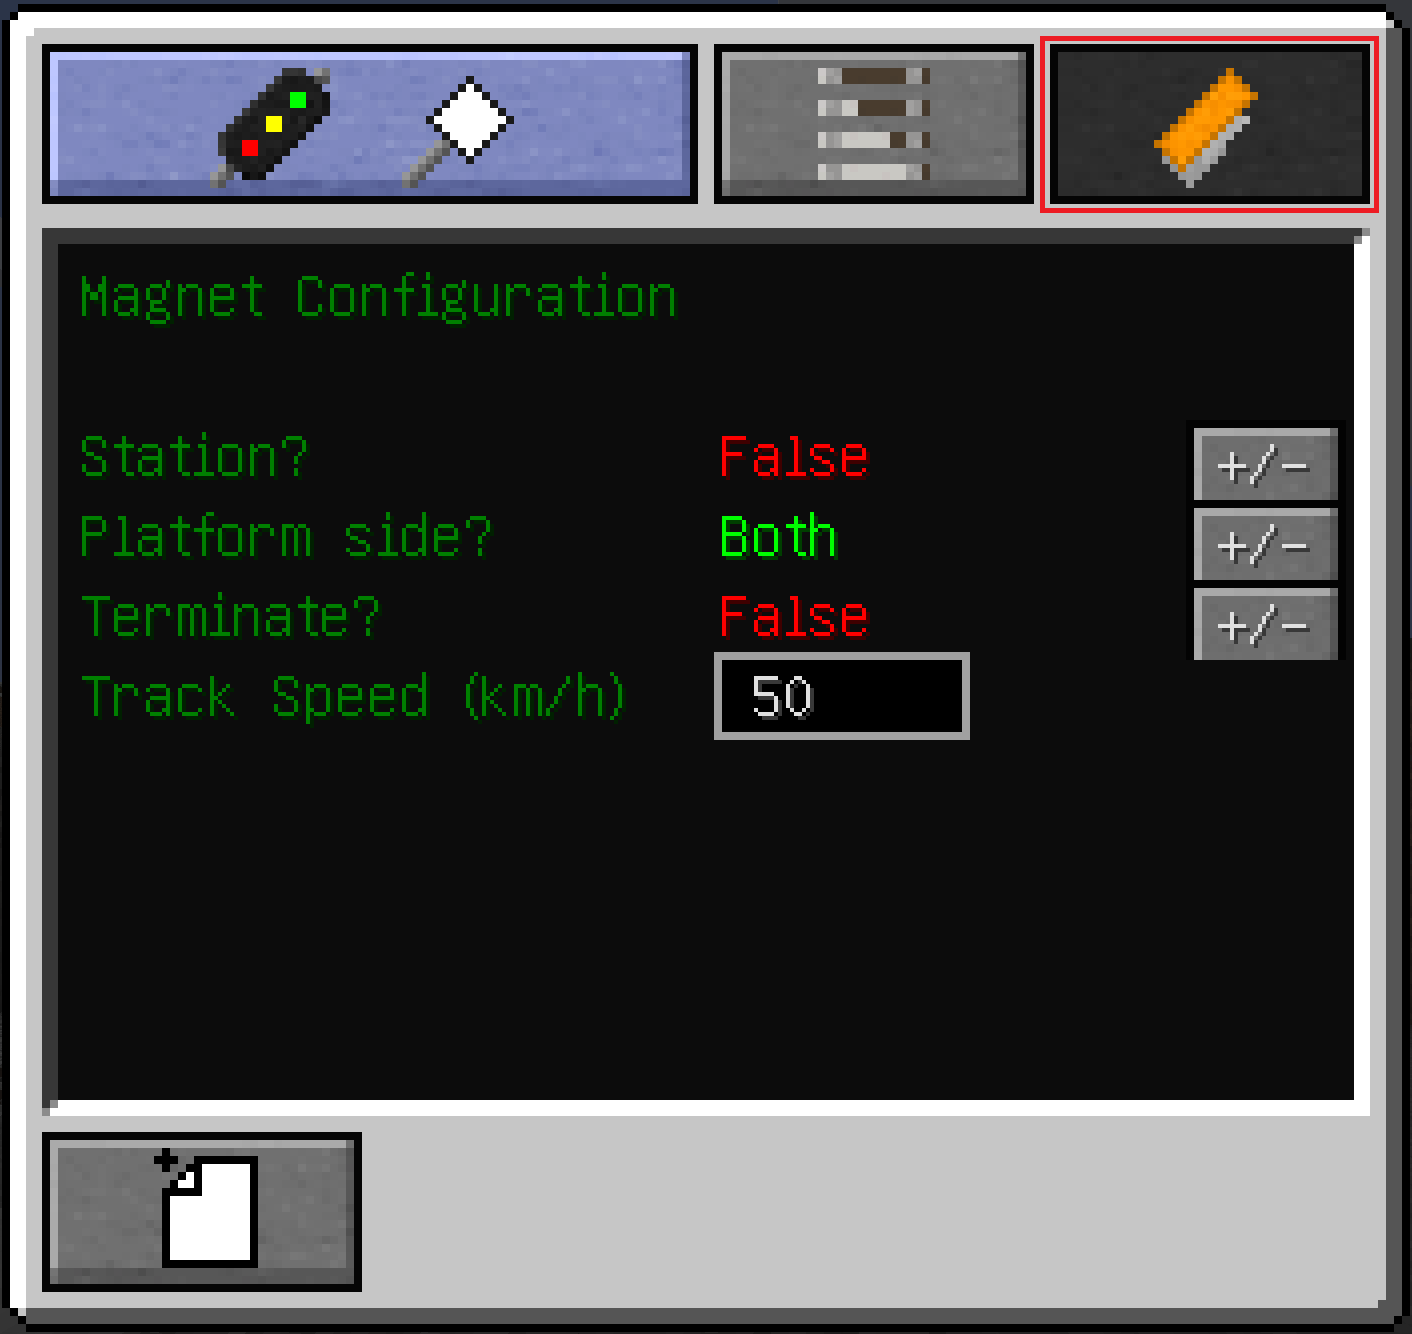
Configuring Magnets
Magnets are the core component of ZnDs MTCS system (similar to ETCS). MTCS is a system made for controlling trains and using autodrive.
Placing magnets:
Magnets can be placed on these tracks:
|
To add a magnet to one of these tracks simply rightclick your track with the Magnet [Railway Part] item. Magnets are directional (they work only in one direction), so make sure to place them (and the corresponding track) while facing in the correct direction!
WARNING: Copying magnets with a Railway Worker's Tool also copies the magnets config. To avoid problems with the configuration always use freshly placed, not copied, magnets.
|
![Magnet [Railway Part]](https://zoranodensha.de/uploads/images/gallery/2025-04/ukvgrafik.png) |
Configuring magnets:
| To configure magnets you need a Signaller's Tool. This tool can only be used to set a magnets configuration. It displays the most recently setup config. There currently is no way of reading a magnets config other than placing down a train and having a look at the next upcoming speed limit. |
 |
You may now configure the magnet according to your needed function. To apply this configuration to the magnet, exit this menu by pressing ESCAPE, hold SHIFT and RIGHTCLICK your magnet.
If done correctly it should say: zoranodensha - Applied settings to magnet |
 |
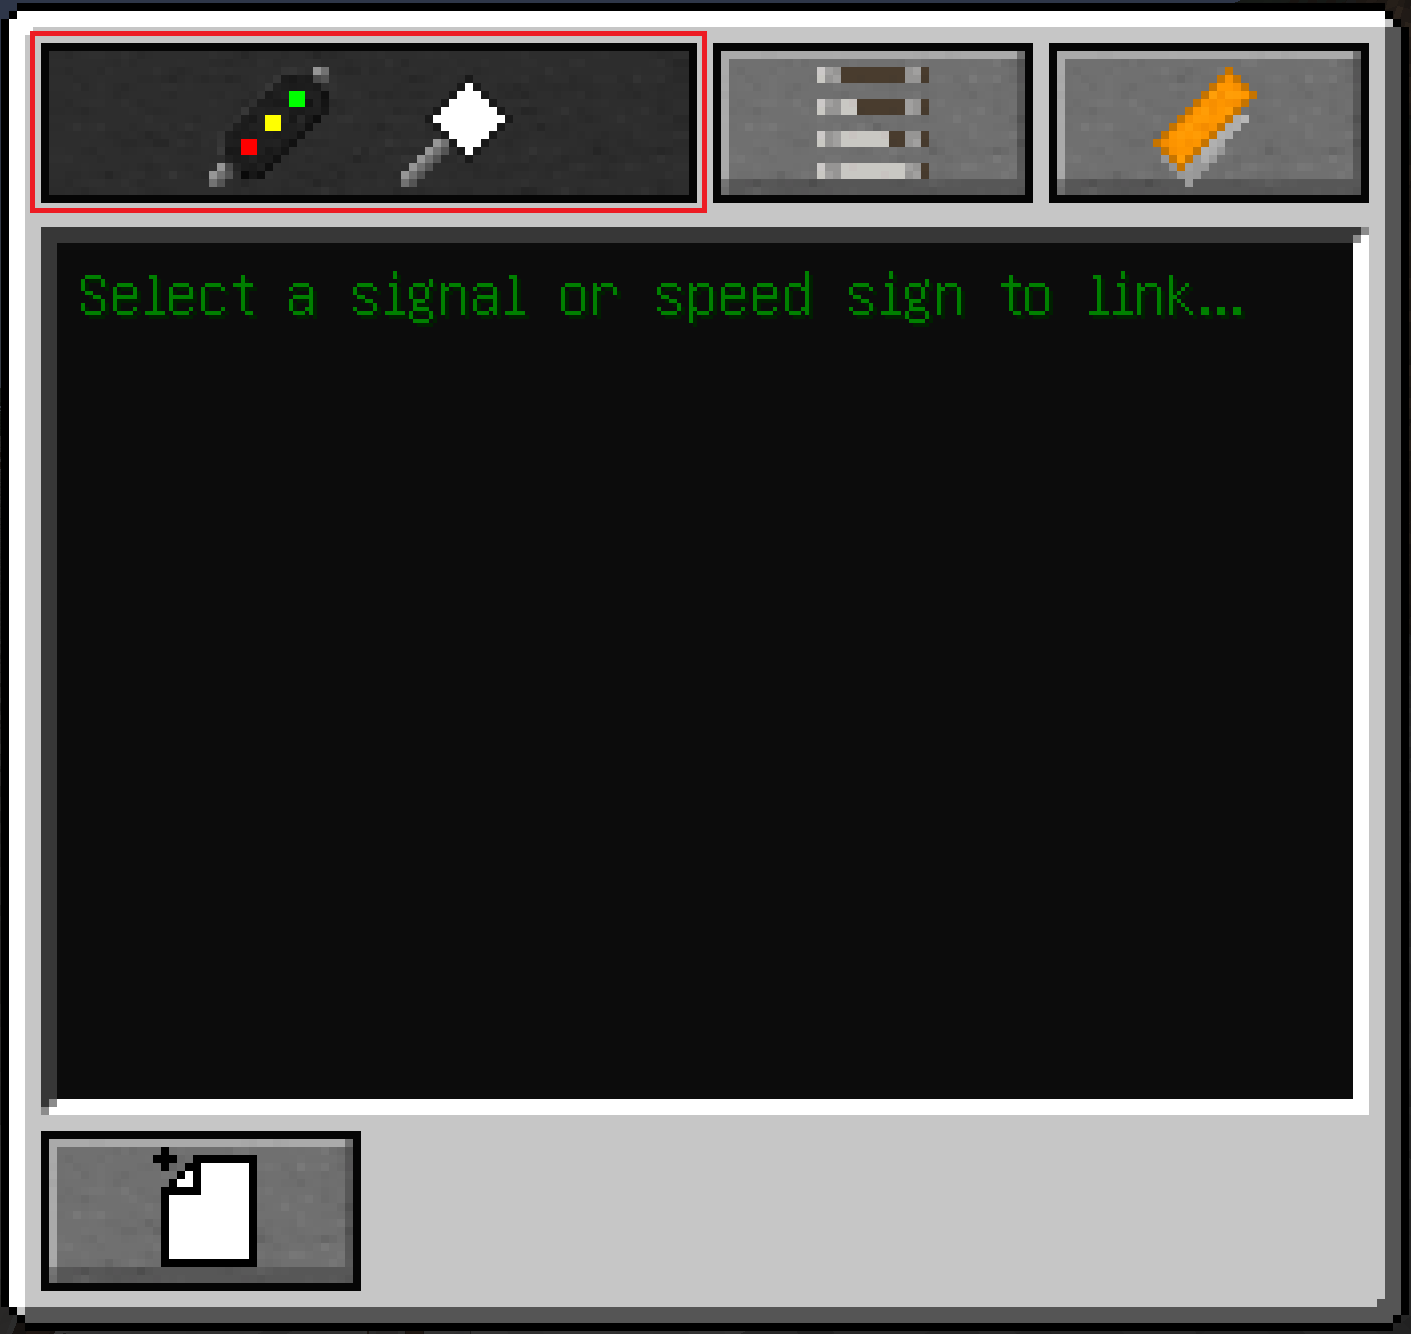
Linking Signals to Magnets
Signals do not have any effect on your train if they are not linked to a track magnet.
To link a signal to a track magnet you once again need your Signaller's Tool.
|
 |
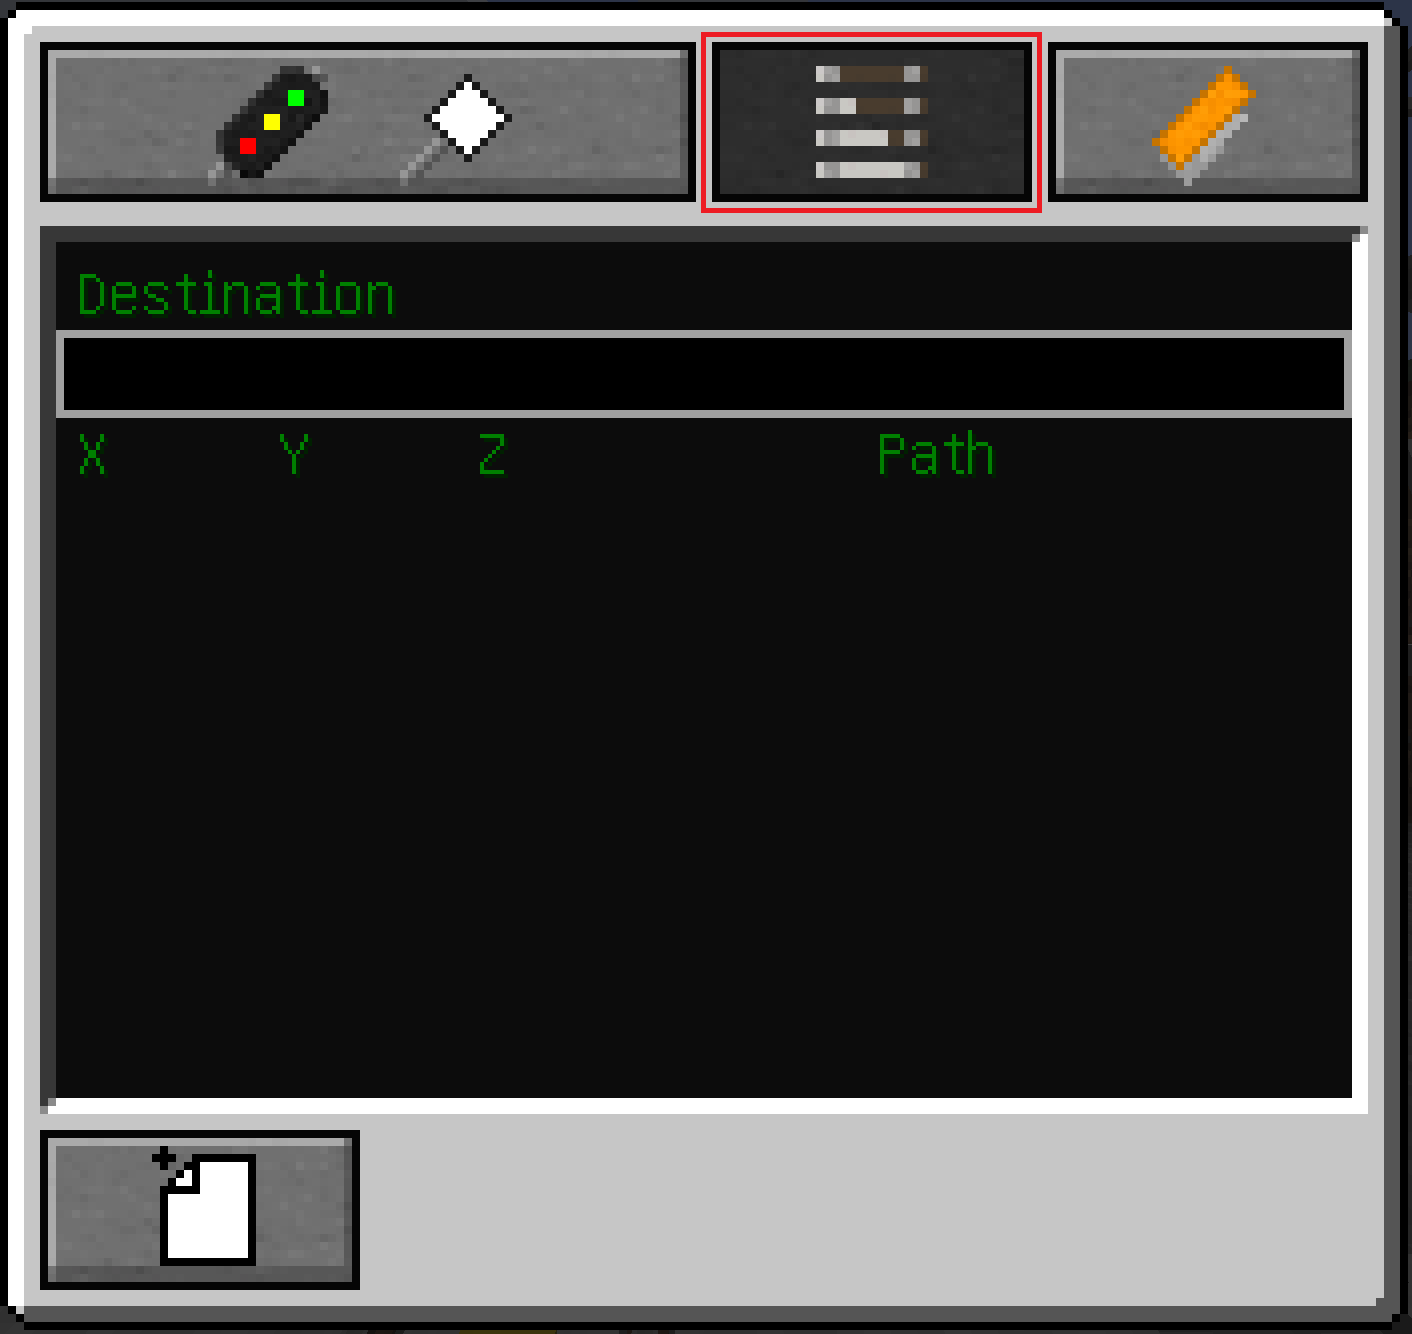
Creating Paths
Paths are used to tell trains where to go. If an autodriving train is configured with a path it tries to follow this path until there is no more path of this name found in the next signal.
Preparation:
Make sure that all of your switches are put in the right position for the path you are configuring. This cannot be changed after the track is selected with your Signaller's Tool.
Creating a Path:
|
 |
Selecting a Path:
Simply type /setdest {insert path name}in the chat. The MTMS-Display should then display upcoming speed limits and your train (if autodrive is turned on) should begin driving.
Types of Signals
Whether you are building a high speed train, tram line or regional service, signals are on of the essentials which everyone of these needs.
Since ZnD v0.9.1 ZnD has its own signals built in, but since v0.10. you can expand these standard signals with signalpacks.
Settings:
Signal Settings:
These settings are common among all signals, even signals from signalpacks.
Values: 0 = "off", 1 = "on"
| Name: | Function: | Default |
| Post Offset L/R | Offsets a signal to the left or right. -1 = offset to the left, 0 = centered on base, 1 = offset to the right |
1 |
| Load Chunks | Loads chunks which a selected path crosses | 0 |
| Redstone Mode |
Can lock the signal when a redstone signal is present/absent:
|
0 |
| One Way | Trains can pass the signal only in one direction | 0 |
Path Settings:
Values: 0 = "off", 1 = "on"
| Name: | Function: | Default |
| Big Black Box | Path name | -- |
| Default |
Sets Path as the signals default path |
-- |
| Shunting |
Lets a train pass the signal even if |
-- |
| Speed | Sets the Paths vMax | 40/-- |
| Route |
Sets the paths nickname |
-- |
| Duplicate | Duplicates a path and all of its settings (apart from "Default") | -------------------------------------------------------------------------------------------- |
| Delete | Deletes a path from the signal. This CANNOT be undone! |
-------------------------------------------------------------------------------------------- |
Default Signals:
- Block Signal
- Distant Signal
- Tunnel Signal
- Dwarf Signal
- Tram Signal:
Good to know:
Tram Signal:
Setting the Route Setting to L or R Displays a \ or / instead of | when the path is selected:
L = \
-- = |
R = /
Default Signs:
- Speed Limit Sign
- MTCS Flag Signal
Signal Aspects
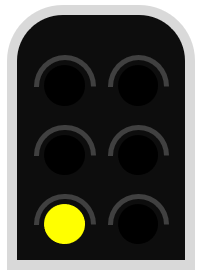
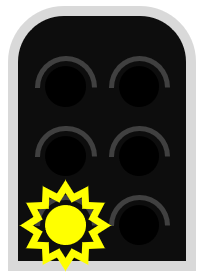
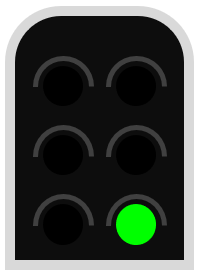
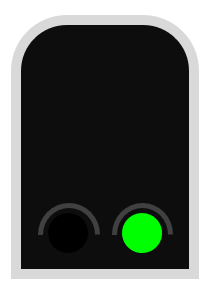
This is an overview of how the default signalling system that comes with Zora no Densha works.
| Main Signal Aspect | Distant Signal Aspect | Indication | Meaning |
 |
STOP | Stop before the signal - passing is not permitted. | |
 |
 |
CAUTION | Proceed at normal speed. Expect the next signal to be displaying STOP. |
 |
 |
EXPECT SLOW | Proceed at normal speed, prepared to do 40 km/h at the next signal. |
 |
 |
CLEAR | Proceed at normal speed. Expect the next signal to be at worst a CAUTION. |
 |
 |
HIGH SPEED | Proceed at normal speed. At least 3 blocks ahead are unoccupied. The next signal is at worst a CLEAR or EXPECT SLOW |
 |
CLEAR SLOW | Proceed at 40 km/h, unless indicated otherwise. The next signal will be displaying a proceed indication, at worst a CAUTION. | |
 |
CAUTION SLOW | Proceed at 40 km/h (unless indicated otherwise). Expect the next signal to be displaying STOP. | |
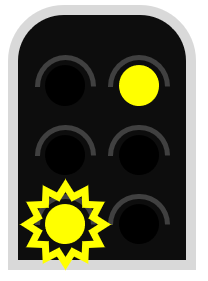 |
SUSTAINED SLOW | Proceed at 40 km/h (unless indicated otherwise), prepared to do 40 km/h at the next signal. |
Autodrive & Improving Performance
Here you can learn how to use and manage autodriving trains.
Using/Configuring Autodrive
Before reading this article, we recommend reading the Paths & Signals tutorial.
Preparations:
- Configure a path on one of your signals (keep in mind that you need atleast 2 consecutive signals - ideally a "signal block" - in order for this tutorial to work). Remember the name of this path.
- Place a locomotive infront of the signal with the configured path
- Enter the locomotive and set it up to go forward (but don't accelerate!)
- Enter the chat and type the following command:
|
Command: |
Function: |
|
/setdest <pathname> |
Makes the train follow a specific user-preconfigured signal path. <pathname> must be replaced by your paths name! |
The trains main display (by default the center display) should now start displaying upcoming/current speed limits and/or upcoming track events (stops, signals, etc.).
Activating Autodrive:
|
|
There should now be a green checkmark behind "Autodrive" signalling that it is now active. The train should now start moving on its own until it cannot follow any more paths. |
|
You can easily spot trains which have autodrive active through the villager in their cabs.
Improving Performance
As autodrive trains are constantly loading chunks along their way it is recommended to get rid of these as these increasingly hog server performance.
Getting rid of autodrive chunks:
Whenever server performance is starting to take a hit, you can run this command, to discard any unused loaded chunks.
| Command: | Function: |
| /purgetrainchunks | Deletes any unused autodrive chunks. |
Signal Panel & Manual Signalling
Here you can learn how to use ZnDs signal panel.
Default Keyboard Shortcuts
Please note that following keyboard shortcuts assume that you use default settings; the respective key might differ depending on your settings.
Navigating:
| Key/Shortcut | Function | Short Description |
|---|---|---|
| Arrow Keys | MOVE view | Move the view around. |
Editing Tiles:
| Key/Shortcut | Function | Short Description |
|---|---|---|
| Q | ROTATE TILE left | Rotates the selected tile counterclockwise. |
| E | ROTATE TILE right | Rotates the selected tile clockwise. |
| DELETE | REMOVE selection | Deletes a selected tile from the view. |
| S | ADDs a signal tile | Adds a new signal tile in the selected tile. |
| L | ADDs a text-label tile | Adds a new text-label tile in the selected tile. |
| 1 | ADDs a straight tile | Adds a new straight track tile. |
| 2 | ADDs a diagonal straight tile | Adds a new diagonal straight track tile. |
|
3 |
ADDs a regular switch (RIGHT) tile | Adds a new regular switch (RIGHT) track tile. |
| 4 |
ADDs a regular switch (LEFT) tile |
Adds a new regular switch (LEFT) track tile. |
| 5 |
ADDs a diagonal switch (LEFT) tile |
Adds a new diagonal switch (LEFT) track tile. |
| 6 |
ADDs a diagonal switch (RIGHT) tile |
Adds a new diagonal switch (RIGHT) track tile. |
| 7 |
ADDs a curve (RIGHT) tile |
Adds a new curve (RIGHT) track tile. |
| 8 |
ADDs a curve (LEFT) tile |
Adds a new curve (LEFT) track tile. |
| 9 |
ADDs a crossover (LEFT) tile |
Adds a new crossover (LEFT) track tile. |
| 0 |
ADDs a crossover (RIGHT) tile |
Adds a new crossover (RIGHT) track tile. |
Configuring a Signal Panel
Here you can learn how to use and configure a signal panel block. Signal panels allow you to manually control signals and monitor trains and signal behaviour.
Configuring a Signal Panel:
The signal panel consists of a grid of 16x24 so-called tiles. Tiles are the main component of signal panels as you can model nearly every track layout with ZnDs provided tiles.
This works and looks similar to a relay signal box.
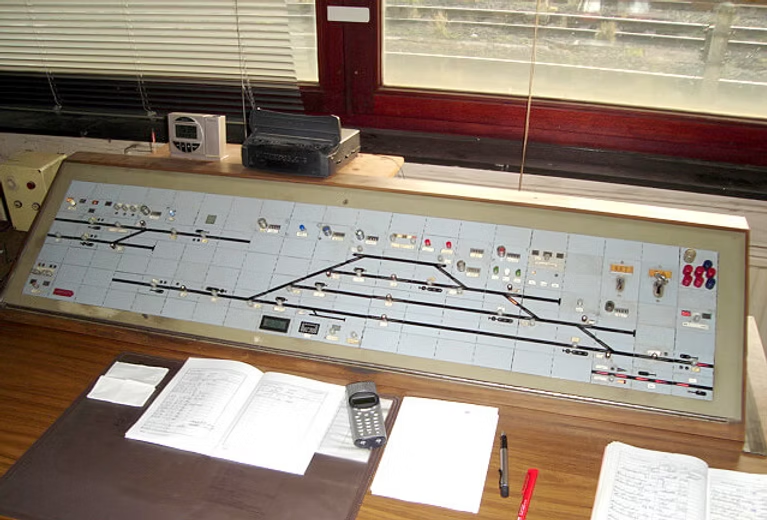
In this tile grid you can select specific tiles by left-clicking them. A selected tile is then highlighted with a yellow box.
After you selected your tile you can then either add track (through the number keys 0-9), signal or text label tiles.
You can only set one kind of tile per tile slot.
Adding Signals:
|
After you added your signal you then are greeted with the gui on the right.
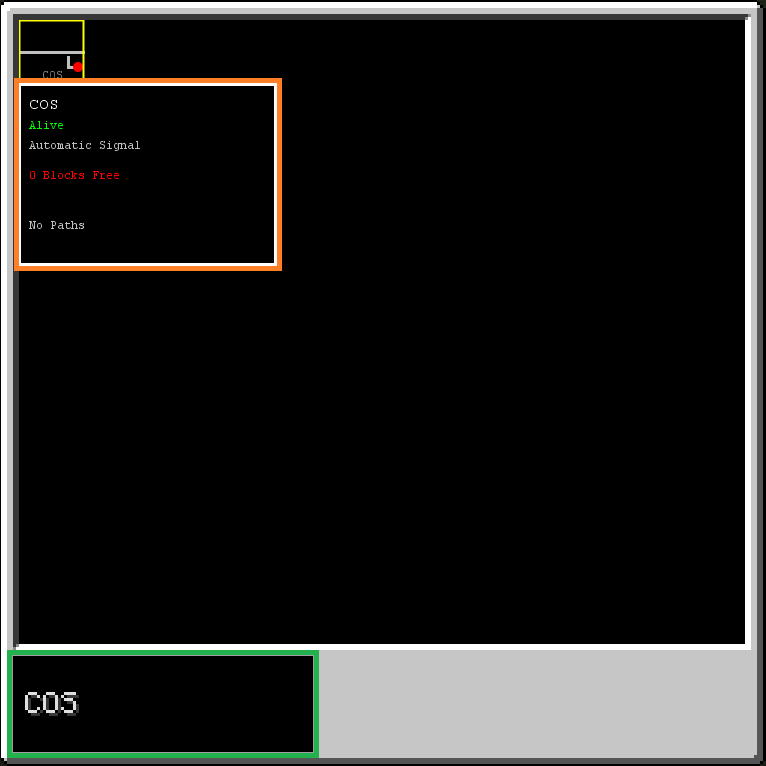
The orange box contains information about the signal. Signals which either are not chunkloaded by an active path or not configured appear as "Dead" and have a grey lightbulb.
The green box contains the signals unique identifier. This is used to couple the signal tile in the signal box to a real signal. This unique identifier can either be found in the real signals settings or on the small panel infront of the signal. |
 |
 |
|
In this small example we then insert "COS" into the green box as our signal identifier. We then can see more status information in the orange box as signal "COS" is currently loaded through the player. "COS" is then marked as "Alive". The next entry then tells us whether this signal is automatic or manually operated. If "COS" contained paths we would also find the paths names where it here says "No Paths". |
 |
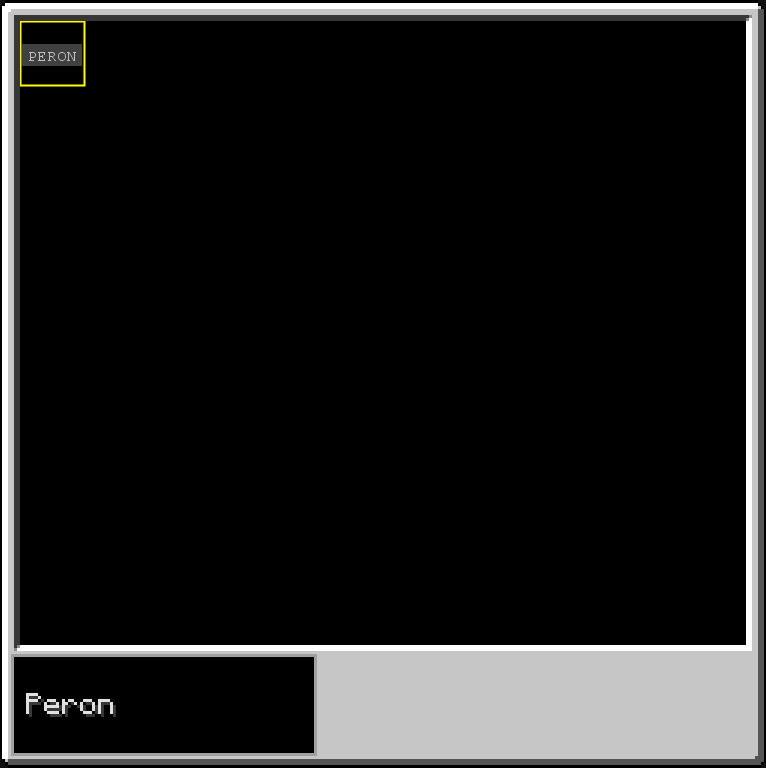
Adding Labels:
|
After you added your text label you then are greeted with the gui on the right. The green box here contains the text which the label needs to display. |
 |
|
If we e.g. set "Peron" as display text we can see that the grey box in our selected tile scales according to our texts length. |
 |
Signalpacks
Signalpacks are a way to integrate more signals of different countries into ZnD.
List of Currently Available Packs
Signalpacks:
How to Install Signalpacks:
To be able to install and use a Signalpack, you need to install the ZnD basemod first.
Hint: Signalpacks are only compatible with ZnD v0.10.X (you need to download the newest Snapshot!).
- Download the Signalpacks .jar file from its Wiki-Page
- Open your Minecraft mods folder
- Copy the Signalpacks .jar file into your mods folder
German Signals
Hint: You can download the mod .jar in the top left under the "Attachments" section!
Types of Signals:
Electronic Signals:
- Ks Main Signal
- Ks Distant Signal
- Ks Block Signal
- Ks Tunnel Signal
- H/V Main Signal
- H/V Combined Signal
- H/V Distant Signal
- Hl Main Signal
- Hl Distant Signal
- Dwarf Signal
- LZB Virtual Signal
Settings:
Values: 0 = "off", 1 = "on"
| Name: | Function: | Default: |
| (Upper) Speed Indicator (Zs 3) | Adds/Removes a dedicated speed indicator | 0 |
| (Lower) Speed Indicator (Zs 3v) | Adds/Removes a dedicated speed indicator | 0 |
| Route Indicator (Zs 2) | Adds/Removes a dedicated path indicator - displays selected paths name | 0 |
Mechanical Signals:
- H/V Main Signal (Old)
- H/V Combined Signal (Old)
- H/V Distant Signal (Old)
Settings:
Values: 0 = "off", 1 = "on"
| Name: | Function: | Default: |
| (Main) Lower Arm (Hp 2) | Adds/Removes a lower mechanical arm | 0 |
| (Distant) Lower Arm (Vr 2) | Adds/Removesa lower mechanical arm | 0 |
Types of Signs:
Speed Signs:
- Speed Sign (Lf7) - displays new speed limits
- Speed Sign (Lf6) - displays upcoming speed limits
Version History:
Version 1.3 (Download):
- Added mechanical H/V Signals
Version 1.1:
- Created Ks Signals
Items, Fluids, etc.
List of Items
C
|
Circuit |
|
|---|---|
 |
Used as crafting ingredient. |
|
Coal Coke |
|
|---|---|
 |
Coal Coke is retrieved from the Coke Oven by smelting Coal. It can be used as fuel and crafted into a Block of Coal Coke. |
|
Crowbar |
|
|---|---|
 |
Used to remove items from Signs, Crossing Posts, and to safely disassemble a track. |
D
|
Driver's Key |
|
|---|---|
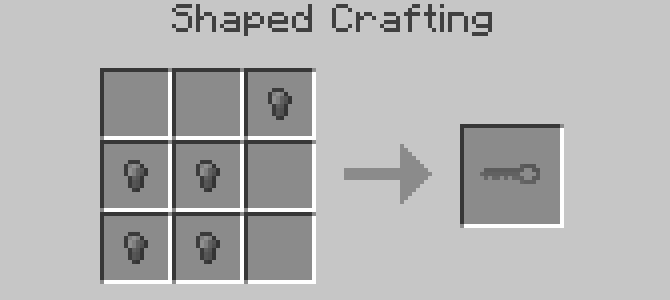 |
Used to access various structures, such as Level Crossing Boxes. Also used to unlock trains. |
F
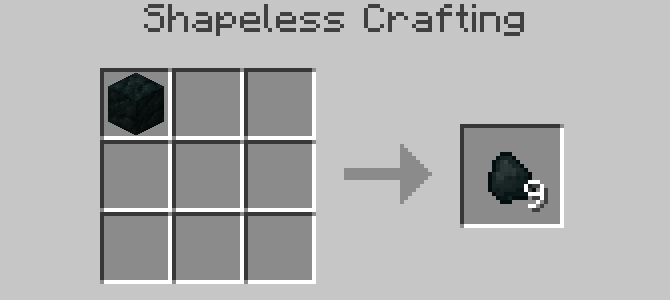
| Clamps | |
|---|---|
 |
Used for track assembly. |
M
|
Machine Kit |
|
|---|---|
 |
Used during construction of multi-block structures, such as the Refinery or Retorter. |
|
Monitor |
|
|---|---|
 |
Used as crafting ingredient. |
O
|
Oil Shale |
|
|---|---|
 |
Processed in the Retorter to obtain Crude Shale Oil. Retrieved by mining Oil Shale Deposit blocks. |
P
|
Plastic Dust |
|
|---|---|
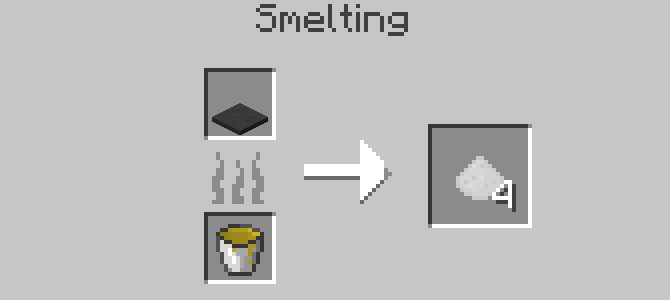 |
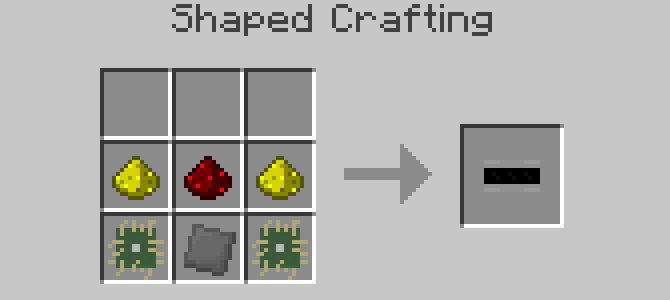
Used as crafting ingredient. Smelted from Tar Blocks in the furnace. |
|
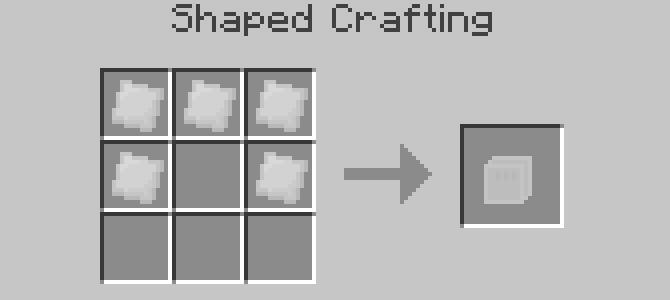
Plastic Casing |
|
|---|---|
 |
Used as crafting ingredient. |
|
Plastic Sheet |
|
|---|---|
 |
Used as crafting ingredient. |
R
|
Rails |
|
|---|---|
 |
Used to for track assembly. Can also be placed in the world. |
|
Reflective Jacket |
|
|---|---|
 |
A wearable jacket with a fancy look. Inspired by the Dutch NS conductor's jackets. |
|
Reflective Vest |
|
|---|---|
 |
A wearable vest with a bright look. |
S
|
Steel Ingot |
|
|---|---|
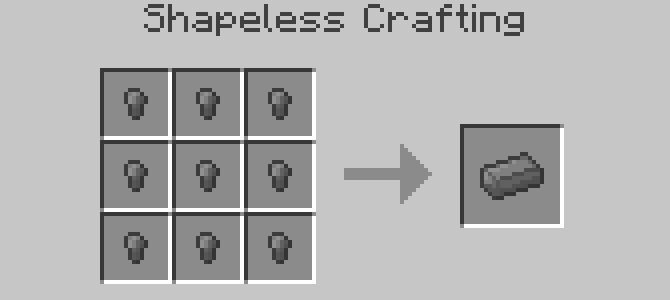 |
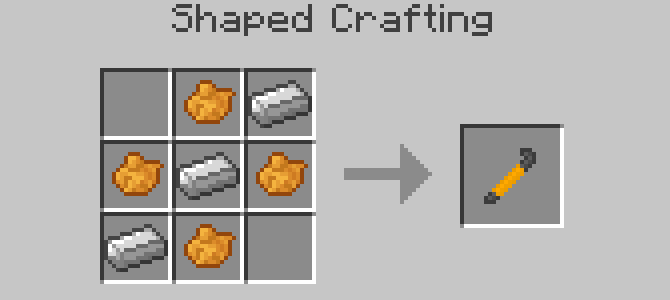
Used as crafting ingredient. Smelted from Iron Ingot in a Blast Furnace, or crafted from 9 Steel Nugget. |
|
Steel Nugget |
|
|---|---|
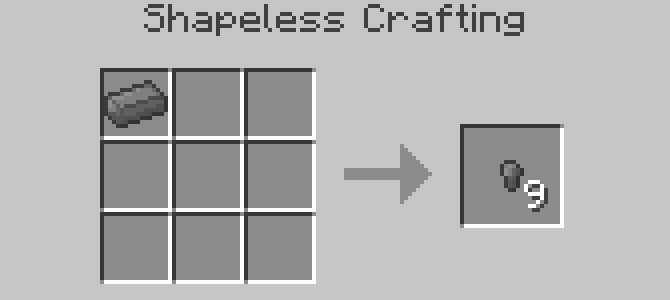 |
Used as crafting ingredient. Crafted from a Steel Ingot. |
|
Steel Plate |
|
|---|---|
 |
Used as crafting ingredient. |
|
Stilts |
|
|---|---|
 |
Used instead of track beds to assemble a Maintenance Track. |
T
|
Track Bed |
|
|---|---|
 |
Used to for track assembly. Can also be placed in the world. |
|
Track Bed (Concrete) |
|
|---|---|
 |
Used to for track assembly. Can also be placed in the world. |
|
Track Plate |
|
|---|---|
 |
Can be used when assembling straight tracks. When applied, a track will render plates on top of itself. |
|
Railway Worker's Tool |
|
|---|---|
 |
Used configure infrastructure and to copy tracks in Creative Mode. |
W
|
Wireless Sensor |
|
|---|---|
 |
Used as crafting ingredient. |
List of Liquids
This page contains a list of all liquids added by Zora no Densha.
It will be updated according to development, thus there may be features listed that are not available yet.
C
|
Creosote Oil |
|
|---|---|
| Used to craft Wooden Track Bed and as fuel in a furnace. Each bottle/ bucket lasts twice as long as wood. Ore Dictionary Name: oilCreosote Density Value: 1070 Temperature Value: 400 |
|
Crude Bio Oil |
|
|---|---|
| Processed in the Refinery to retrieve refined products, such as fuel. Ore Dictionary Name: oilBioCrude Density Value: 1250 Temperature Value: 293 Viscosity Value: 2300 |
|
Crude Shale Oil |
|
|---|---|
| Processed in the Refinery to retrieve refined products, such as fuel. Ore Dictionary Name: oilShaleCrude Density Value: 992 Temperature Value: 288 Viscosity Value: 2400 |
D
|
Diesel |
|
|---|---|
| Fuel for vehicles. Can be used as fuel in a furnace. A bucket or bottle will last slightly longer than a piece of coal. Ore Dictionary Name: fuelDiesel Density Value: 832 Temperature Value: 313 Viscosity Value: 900 |
M
|
Machine Lubricant |
|
|---|---|
| Used for vehicles and buffer crafting. Ore Dictionary Name: oilLubricant Density Value: 950 Temperature Value: 288 Viscosity Value: 7500 |
|
Machine Oil |
|
|---|---|
| Used for vehicles and bogie crafting. Ore Dictionary Name: oilMachinery Density Value: 910 Temperature Value: 288 Viscosity Value: 900 |
P
|
Petrol |
|
|---|---|
| Fuel for vehicles. Can be used as fuel in a furnace. A bucket or bottle will last slightly longer than a piece of coal. Ore Dictionary Name: fuel Density Value: 737 Temperature Value: 289 Viscosity Value: 700 |
T
|
Tar |
|
|---|---|
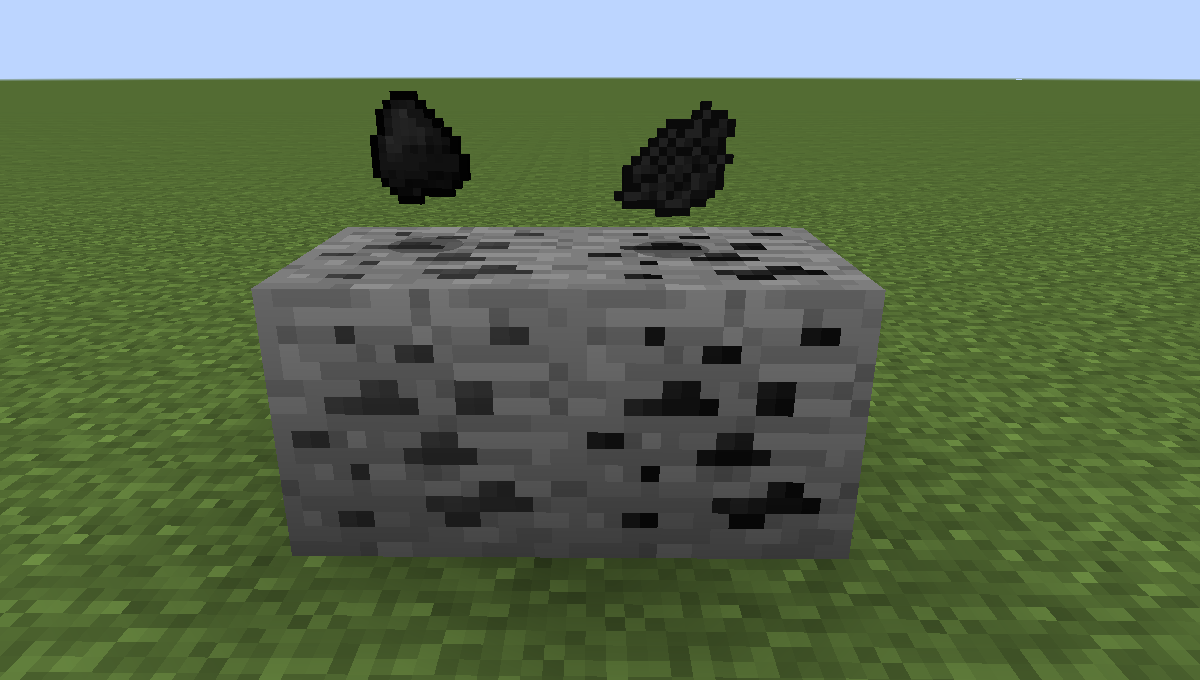
| Tar can be placed from a bucket into the world to create a Tar Block. These Tar Blocks can then be smelted to obtain Platic. Furthermore, Tar is used when crafting Trackbeds Ore Dictionary Name: tar Density Value: 1153 Temperature Value: 333 Viscosity Value: 5000 |
Development & Beta Testing
Information regarding how to configure beta testing environments
Configuring an IntelliJ Beta-testing Environment From Scratch
WIP - Proper formatting, better explanations, and images to be added later (but this should do for now)
Preparation:
Download and install IntelliJ (Community Edition).
Download and install Java 8.
Setting up IntelliJ:
- Clone the Zora no Densha repository into an empty folder.
- Using either the command line or a Git management tool (such as GitKraken), switch the branch of the downloaded repository to mc-1.7.10.
- Start IntelliJ and open the downloaded repository's folder as the current project. Allow IntelliJ to 'trust' the folder/project if such a warning appears.
- Allow the project to automatically configure itself. There should be a progress bar or status message within IntelliJ advising that the project is currently importing.
- Once the project is fully imported and no other tasks are running in the background, add a Run Configuration to IntelliJ to be able to start the game. A Gradle run configuration should be added with the task runClient.
- Change Gradle Java version to 1.8 (elephant on the right, then the small cogwheel)
- Start the game using the Debug function in IntelliJ.
Exporting your Work
When you finished implementing your feature/fix and want to export/test your work you need to use one of these commands.
Setting up Gradle run configs:
| Command | Effect |
|---|---|
| runClient/runServer | Starts the game locally without exporting to a .jar file |
| build | Exports the current state of the mod to a .jar mod file |