| To add a magnet to one of these tracks simply rightclick your track with the **Magnet \[Railway Part\]** item. **Magnets are directional** (they work only in one direction), so make sure to place them (and the corresponding track) while facing in the correct direction! ***WARNING:** Copying magnets with a Railway Worker's Tool also copies the magnets config. To avoid problems* *with the configuration always use freshly placed, not copied, magnets.* | [![Magnet [Railway Part]](https://zoranodensha.de/uploads/images/gallery/2025-04/scaled-1680-/ukvgrafik.png)](https://zoranodensha.de/uploads/images/gallery/2025-04/ukvgrafik.png) |
| To configure magnets you need a Signaller's Tool. This tool can only be used to **set** a magnets configuration. It displays the most recently setup config. There currently is no way of reading a magnets config other than placing down a train and having a look at the next upcoming speed limit. | [](https://zoranodensha.de/uploads/images/gallery/2025-04/fBWgrafik.png) |
| 1. Rightclick while holding your Signaller's Tool 2. Click on the Magnet symbol You may now configure the magnet according to your needed function. To apply this configuration to the magnet, exit this menu by pressing **ESCAPE**, hold **SHIFT** and **RIGHTCLICK** your magnet. If done correctly it should say: zoranodensha - Applied settings to magnet | [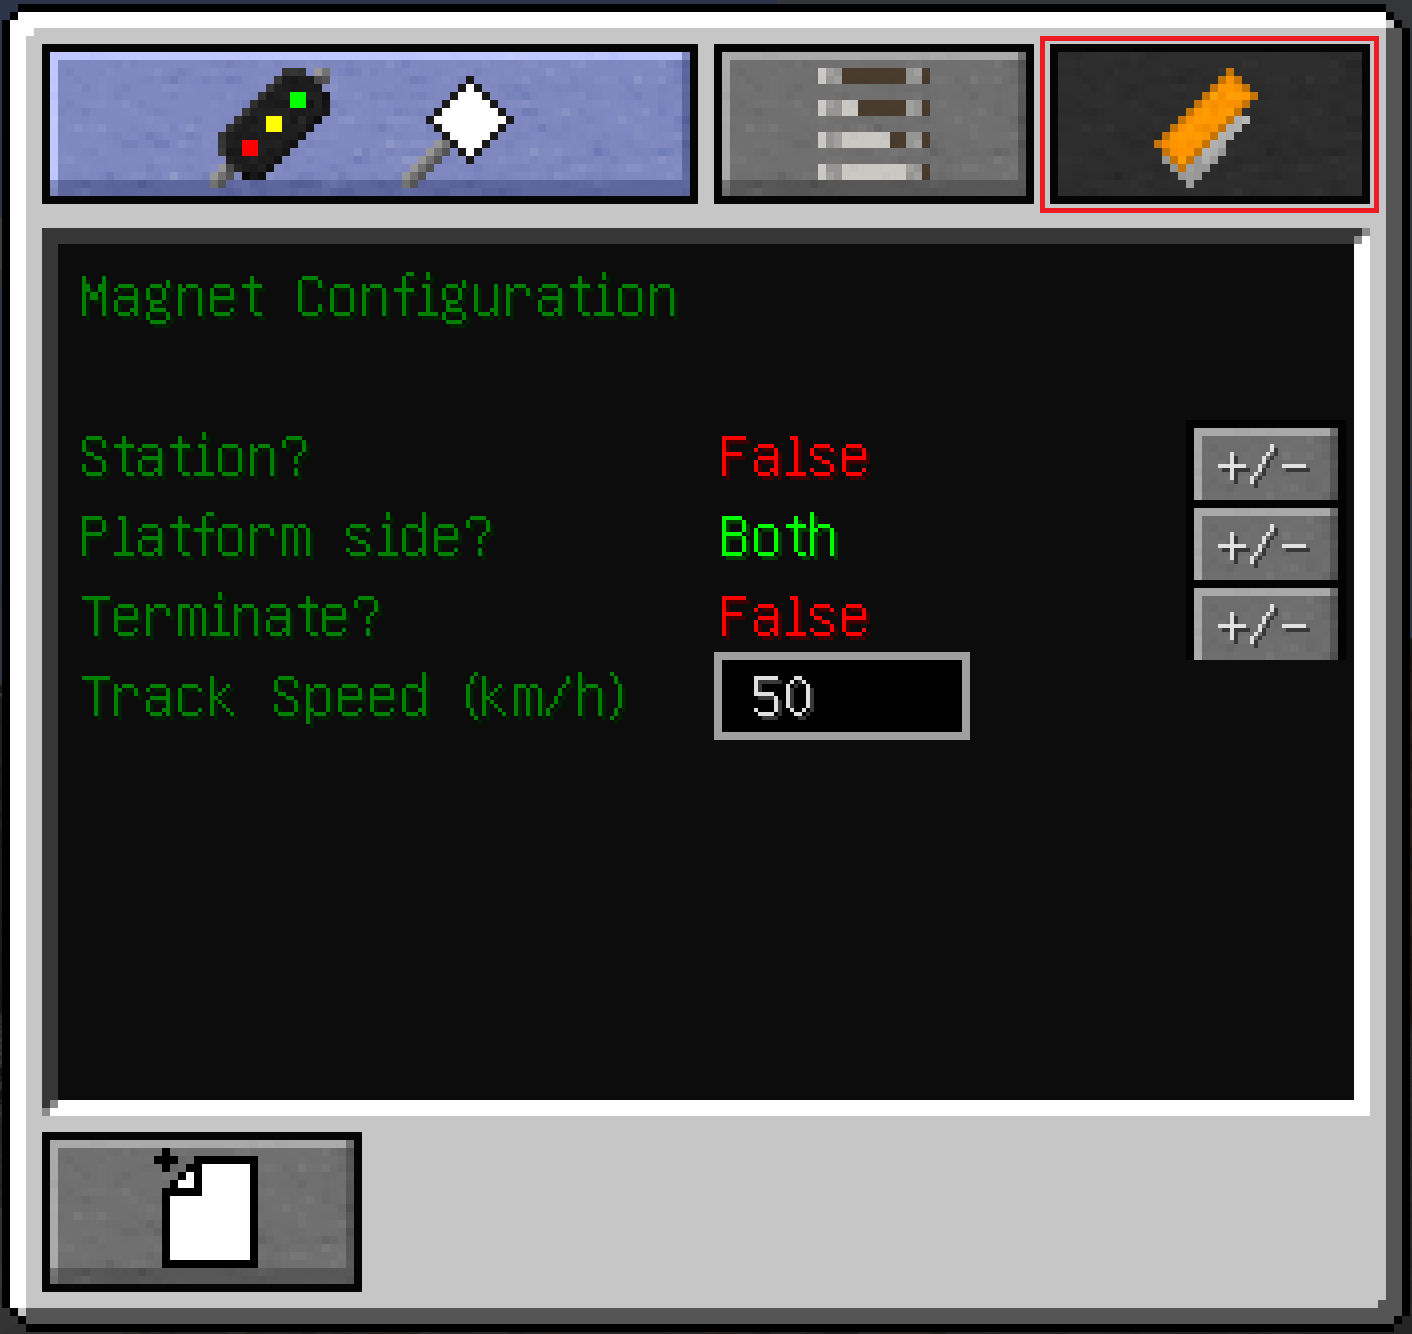](https://zoranodensha.de/uploads/images/gallery/2025-04/zndwiki-signal-tool-interface-magnet.png) |
| 1. Rightclick while holding your Signaller's Tool 2. Click on the Signal symbol 3. Exit the menu (press **ESCAPE**) 4. Press **SHIFT** & **RIGHTCLICK** your signal It should now say: zoranodensha - Linking signal... 5. Press **SHIFT** & **RIGHTCLICK** your magnet It should now say: zoranodensha - Linked | [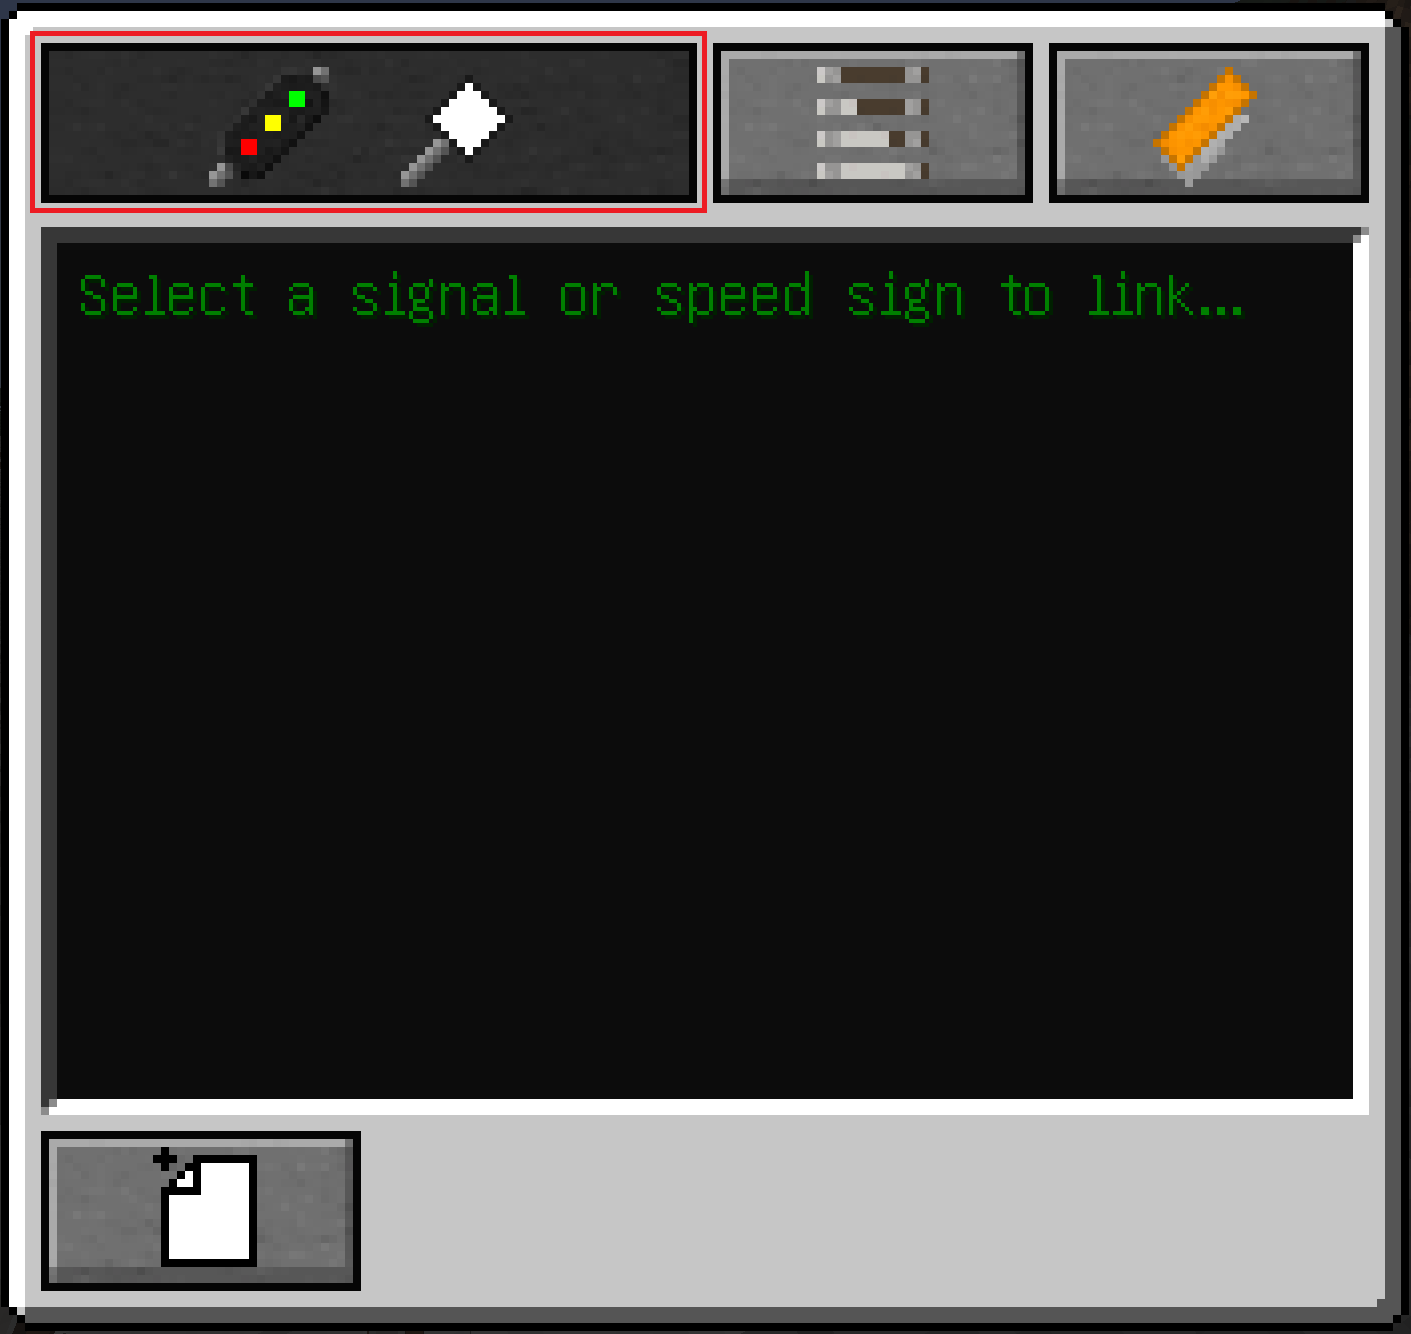](https://zoranodensha.de/uploads/images/gallery/2025-04/zndwiki-signal-tool-interface-signal.png) |
| 1. Rightclick while holding your Signaller's Tool 2. Click on the track-symbol in the top row 3. Give the path a name (box under Destination) 4. Close the menu again (press **ESCAPE**) 5. **SHIFT+RIGHTCLICK** every junction on the path (Only select switches and crossings, as selecting Straights and Curves does not have any effect) It should now say: zoranodensha - Added track to path 6. **SHIFT+RIGHTCLICK** the origin signal to add the finished path to this signal | [](https://zoranodensha.de/uploads/images/gallery/2025-04/zndwiki-signal-tool-interface-path.png) |
| **Name:** | **Function:** | **Default** |
| Post Offset L/R | Offsets a signal to the left or right. -1 = offset to the left, 0 = centered on base, 1 = offset to the right | 1 |
| Load Chunks | Loads chunks which a selected path crosses | 0 |
| Redstone Mode | Can lock the signal when a redstone signal is present/absent: - 0 - normal, redstone signals do not affect signal - **1** - **active** redstone signals reset signal to most restrictive signal aspect (e.g. STOP) - **2** - **absent** redstone signals reset signal to most restrictive signal aspect | 0 |
| One Way | Trains can pass the signal only in one direction | 0 |
| **Name:** | **Function:** | **Default** |
| Big Black Box | Path name | -- |
| Default | Sets Path as the signals default path D = Path set as default | -- |
| Shunting | Lets a train pass the signal even if S = Shunting turned on | -- |
| Speed | Sets the Paths vMax | 40/-- |
| Route | Sets the paths nickname | -- |
| Duplicate | Duplicates a path and all of its settings (apart from "Default") | -------------------------------------------------------------------------------------------- |
| Delete | Deletes a path from the signal. This **CANNOT** be undone! | -------------------------------------------------------------------------------------------- |
| Main Signal Aspect | Distant Signal Aspect | Indication | Meaning |
| [](https://zoranodensha.de/uploads/images/gallery/2025-05/signal0.PNG) | **STOP** | Stop before the signal - passing is not permitted. | |
| [](https://zoranodensha.de/uploads/images/gallery/2025-05/signal1.PNG) | [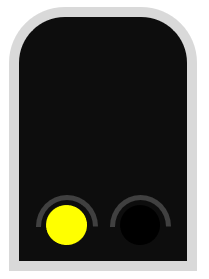](https://zoranodensha.de/uploads/images/gallery/2025-05/distant0.PNG) | **CAUTION** | Proceed at normal speed. Expect the next signal to be displaying **STOP**. |
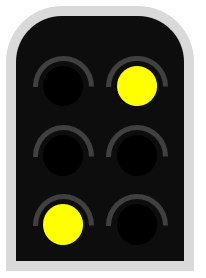
| [](https://zoranodensha.de/uploads/images/gallery/2025-05/signal7.PNG) | [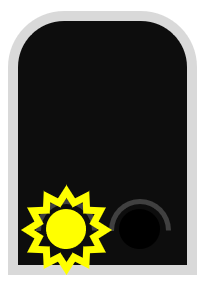](https://zoranodensha.de/uploads/images/gallery/2025-05/distant1.PNG) | **EXPECT SLOW** | Proceed at normal speed, prepared to do 40 km/h at the next signal. |
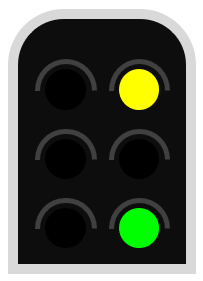
| [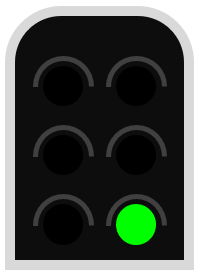](https://zoranodensha.de/uploads/images/gallery/2025-05/signal2.PNG) | [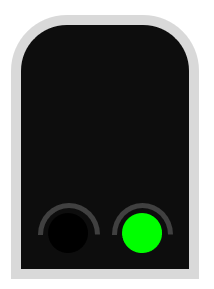](https://zoranodensha.de/uploads/images/gallery/2025-05/distant2.PNG) | **CLEAR** | Proceed at normal speed. Expect the next signal to be at worst a **CAUTION**. |
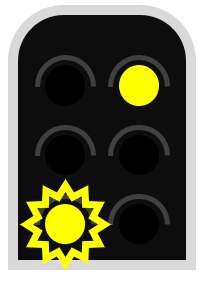
| [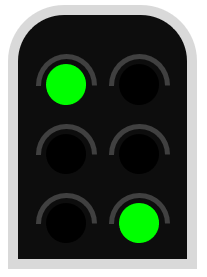](https://zoranodensha.de/uploads/images/gallery/2025-05/signal3.PNG) | [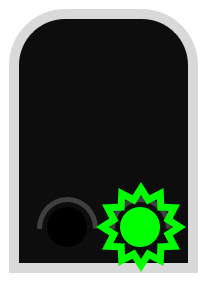](https://zoranodensha.de/uploads/images/gallery/2025-05/distant3.PNG) | **HIGH SPEED** | Proceed at normal speed. At least 3 blocks ahead are unoccupied. The next signal is at worst a **CLEAR** or **EXPECT SLOW** |
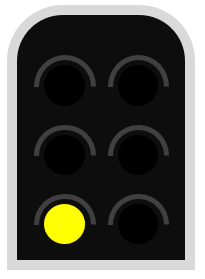
| [](https://zoranodensha.de/uploads/images/gallery/2025-05/signal4.PNG) | **CLEAR SLOW** | Proceed at 40 km/h, unless indicated otherwise. The next signal will be displaying a proceed indication, at worst a **CAUTION**. | |
| [](https://zoranodensha.de/uploads/images/gallery/2025-05/signal5.PNG) | **CAUTION SLOW** | Proceed at 40 km/h (unless indicated otherwise). Expect the next signal to be displaying **STOP**. | |
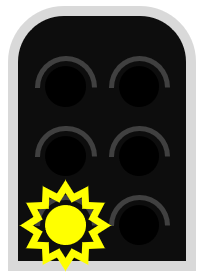
| [](https://zoranodensha.de/uploads/images/gallery/2025-05/signal8.PNG) | **SUSTAINED SLOW** | Proceed at 40 km/h (unless indicated otherwise), prepared to do 40 km/h at the next signal. |